


Our physical spaces make a big impact on our day to day lives. The memories they hold, the way they function and how they look can significantly impact your life. My life took a turn in 2018 when I found myself newly pregnant and single. It wasn’t what I dreamed or imagined would happen in my life but it’s part of my story now and believe it or not this kitchen renovation was a huge part of my healing journey. Over the last few years I’ve found that the more I have made physical changes to my home, the more it has felt like “my space” and not “our space,” if you know what I mean. So while I obviously love design, and loved the idea of having a beautiful kitchen to call my own, it was also an emotional project that needed to happen in order for me to continue healing.
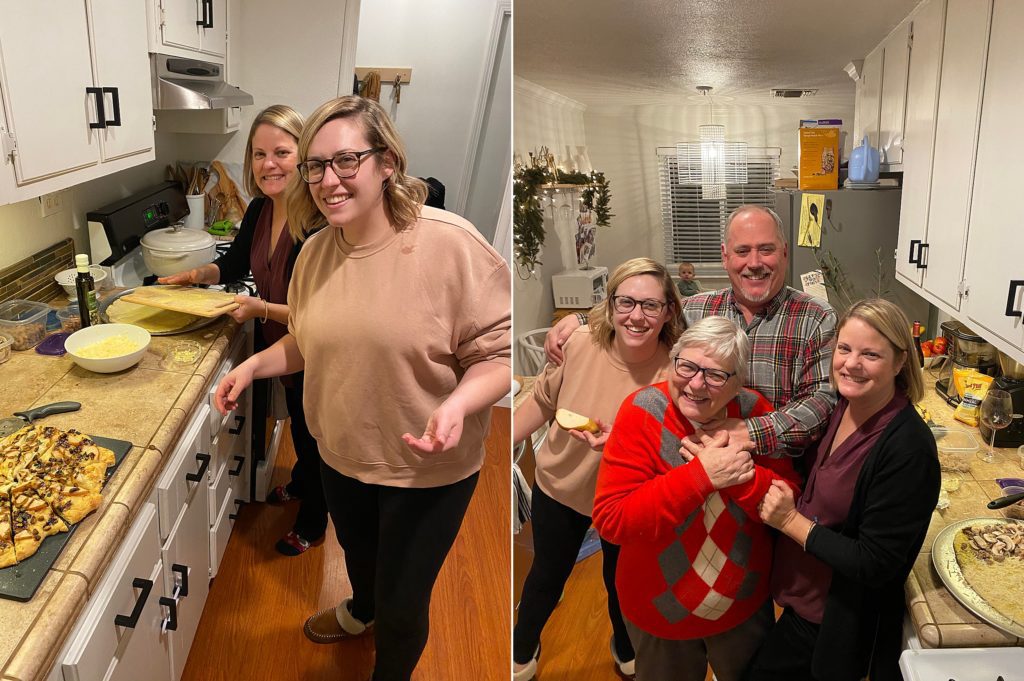
I was honestly terrified to take on a renovation of this scale by myself, but with the help of my family (physically sanding and painting…and also emotionally backing me), my contractor, and my own ambition….the kitchen came to life over the course of 2021. This post has been a long time coming and I figured now was as good of time as ever to dust off my blog and finally sit down to write out the post of my kitchen renovation process.
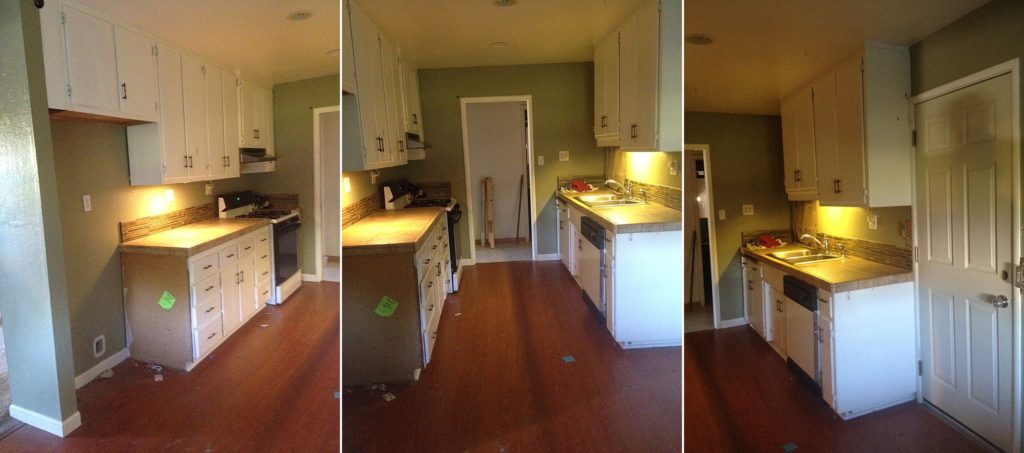
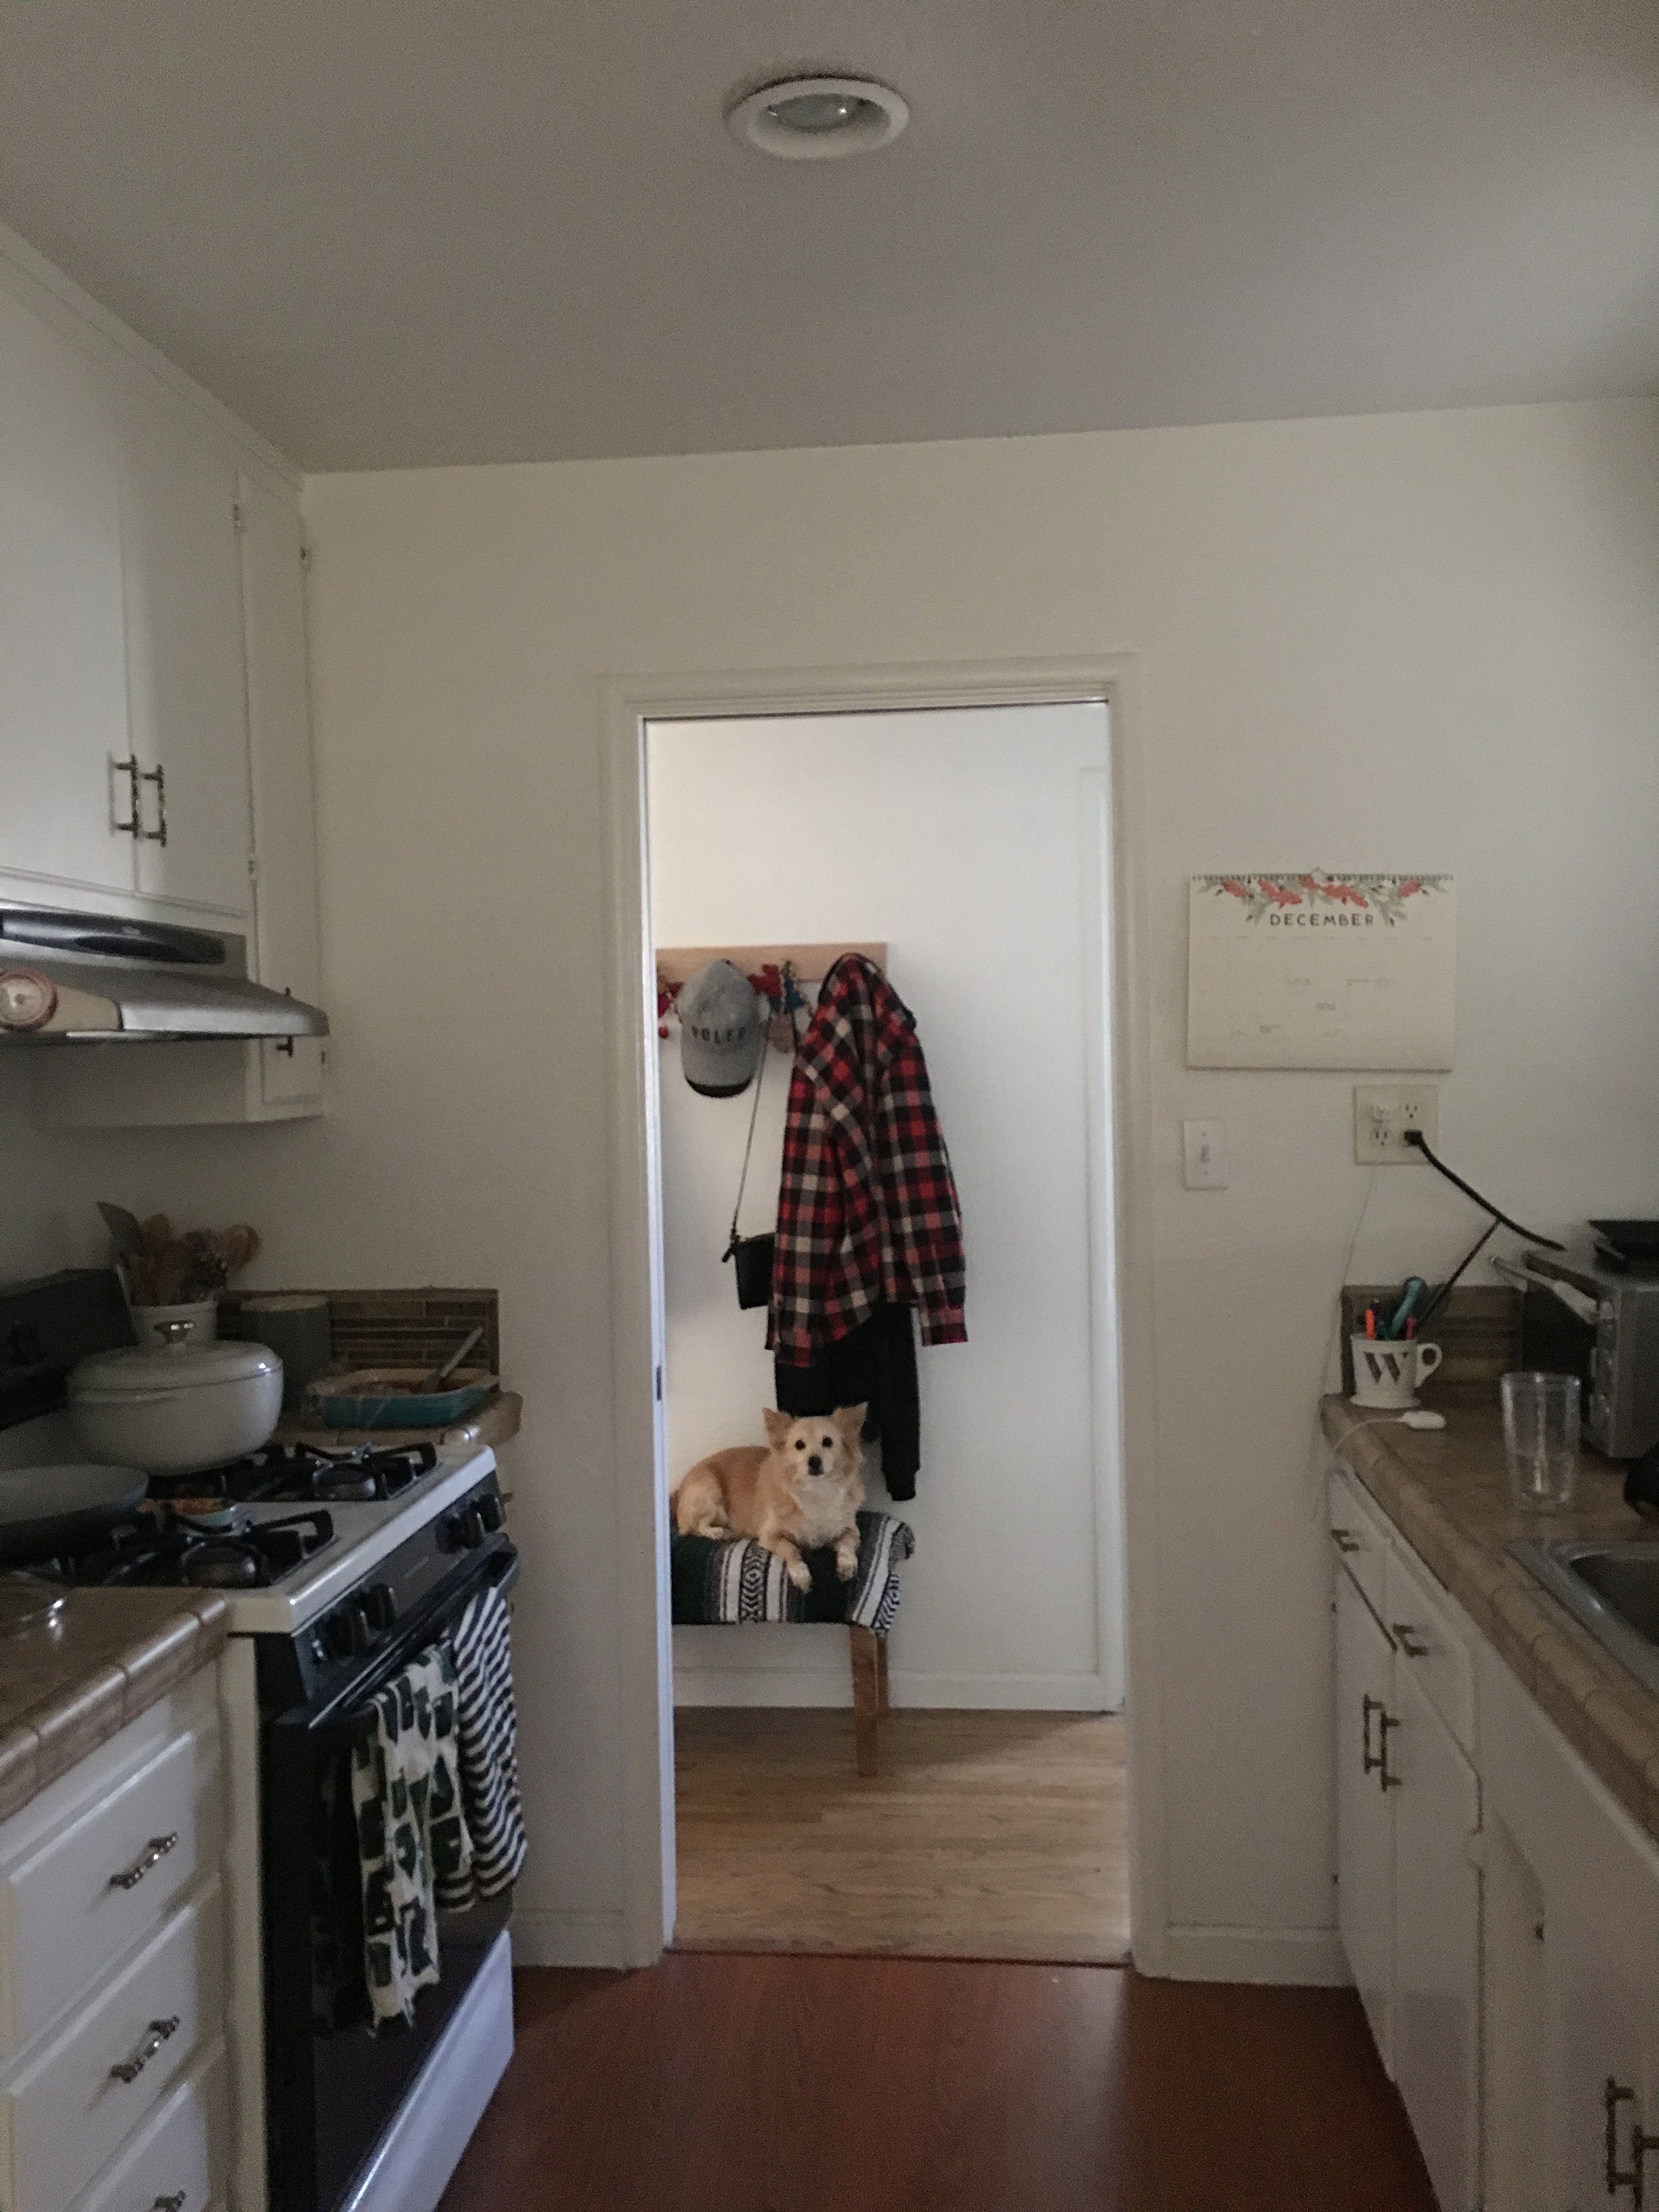
In order to bring you fully up to speed, you have to know where this kitchen began. It was dark, drab, green and worse for wear when I first moved into this home. The previous owners left me a full blown trashed, fixer upper. The floors were some kind of red vinyl, the countertops and backsplash were very tan and very dirty, the walls had about 3 or 4 different textures, but it wasn’t in my budget to renovate this space 7 years ago. So to make due, I gave the cabinets and walls a fresh coat of paint, replaced the dishwasher and eventually the grimy cabinet pulls.. and called her home for 6 years.
I don’t have a great before picture (how can I even be a photographer without a set of these?) But the first set of photos was the day I got the keys to this house. And the following photos, you can see how it was cleaned up and made liveable after some fresh paint and new hardware.
It was fairly challenging to settle on a design plan for this space because I was 50/50 with my options. I was either going to tear out a wall and go for the whole “open concept” living/kitchen space, as my living room shares a wall with the range side of my kitchen. Or, I would go the more cost effective route and embrace the original architecture of my 1960’s galley kitchen.
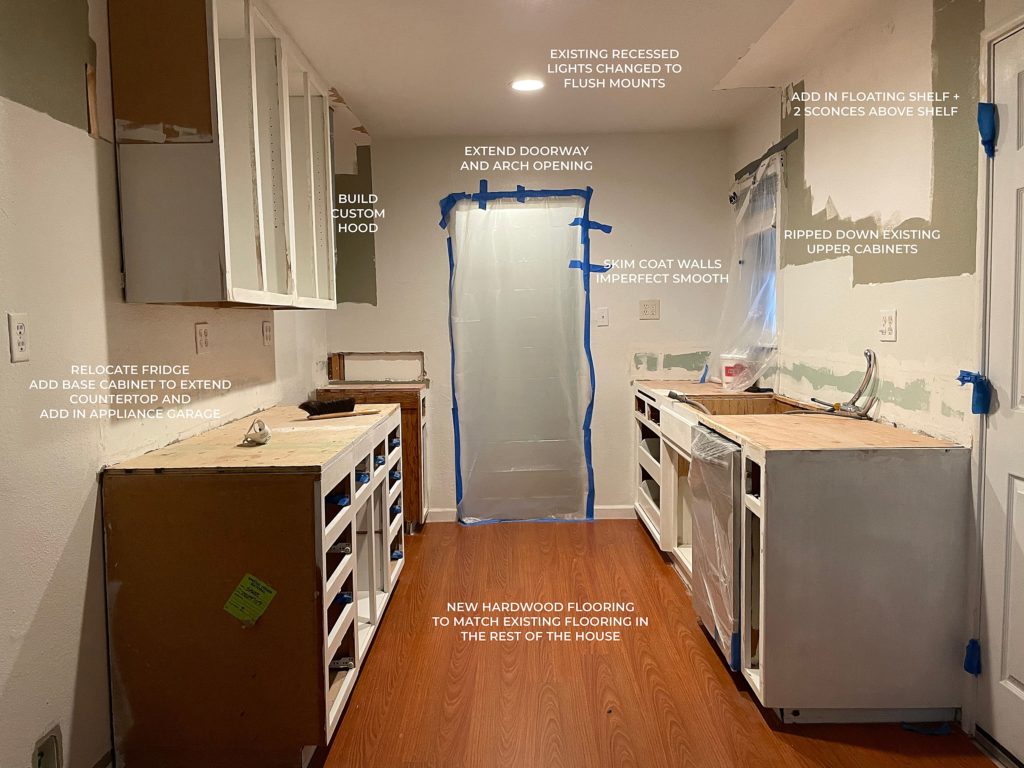
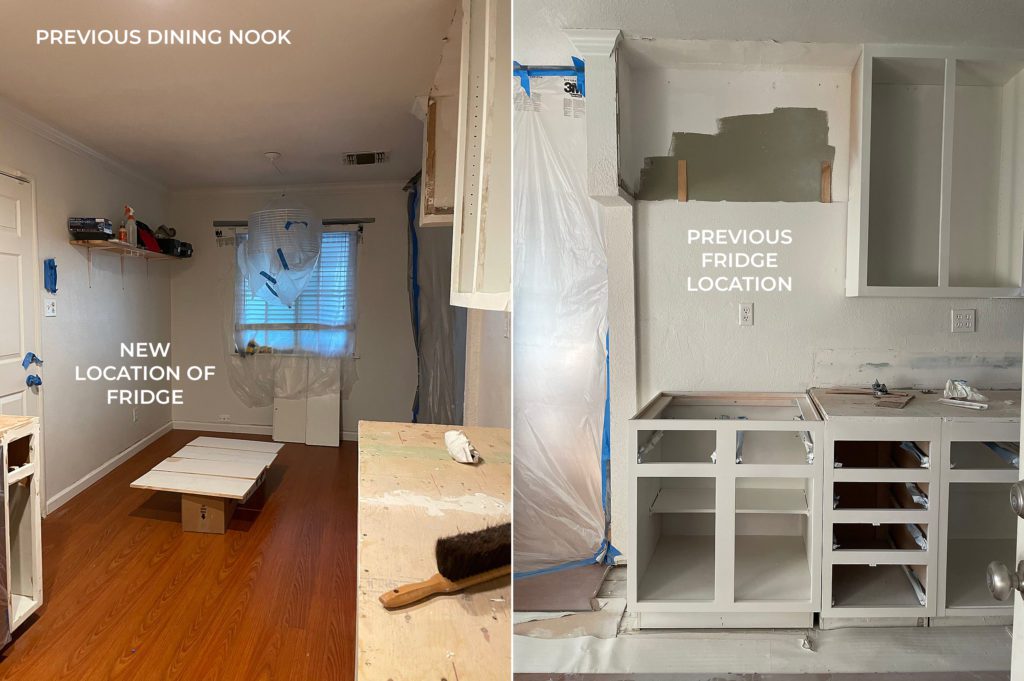
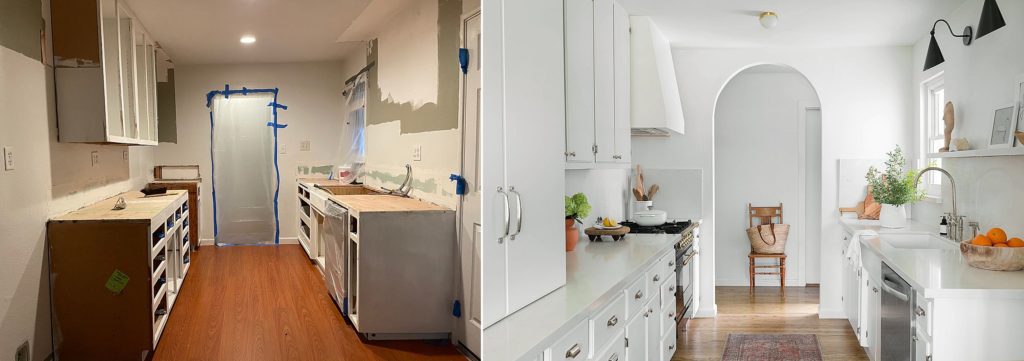
I concluded that I didn’t want to spend thousands of dollars and go through the process of a renovation without improving the overall functionality of the space at least a little bit. So, in order to embrace what I already had I needed to move my refrigerator which was located at the end of my kitchen, seemingly cutting the kitchen in half when the doors were opened. I wanted to move my refrigerator into the designated dining area and add a pantry surround to it. Once I had a contractor come and walk the space with me, my plan was confirmed and I knew that I had enough space to create a new home for my fridge and add on a pantry, offering me way more functionality than I’d ever had before in here.

My plan quickly became operation embrace the galley kitchen. In the photos below you can see that I relocated the fridge from the right side of my kitchen over to the left side and wrapped it with a pantry cabinet. In the old fridge location I brought in a very cost effective HD supply base cabinet to extend my countertop, and had a custom appliance garage installed on top of the counter. So that countertop cabinet holds all of my appliances with doors that retract and slide in so I can still access my full counter area.
About half of this reno was DIY and the other half was hired out. My dad, my brother and I sanded down and refinished the existing cabinets + doors. This was a beast to tackle and it’s something I’m so grateful my family chipped in and helped me with! I used Granite Outlet for my countertops which was very cost effective, but in hindsight I wish I would have gone a different route. The countertops are my least favorite part of my kitchen. They chipped about 2 weeks after install and weren’t installed all that well. But they’re loads better than the tan tile I started with. ;)
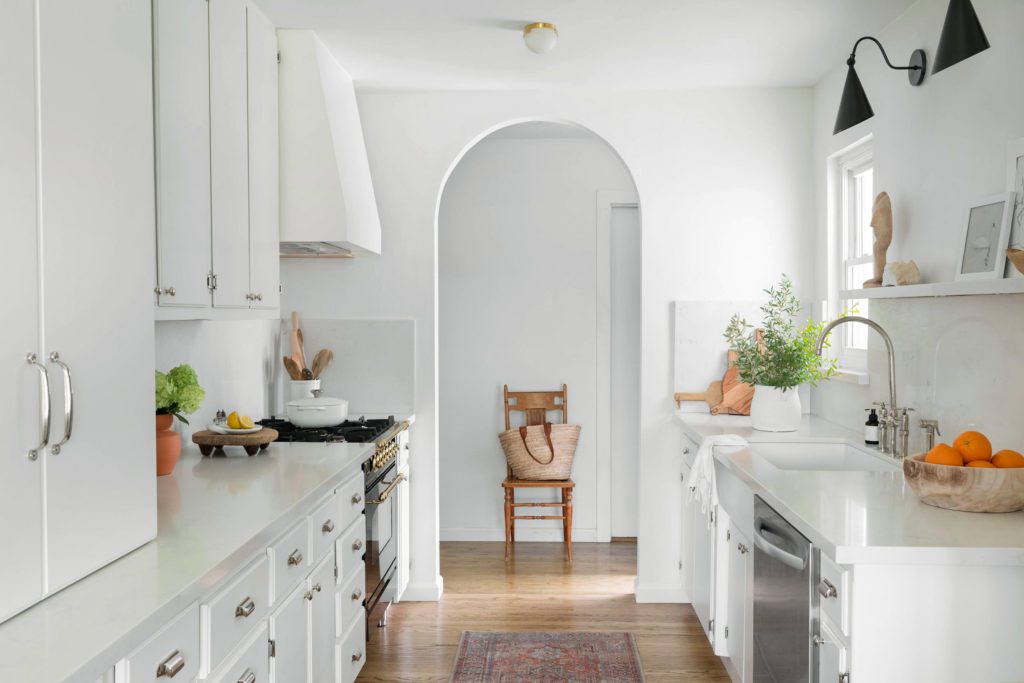
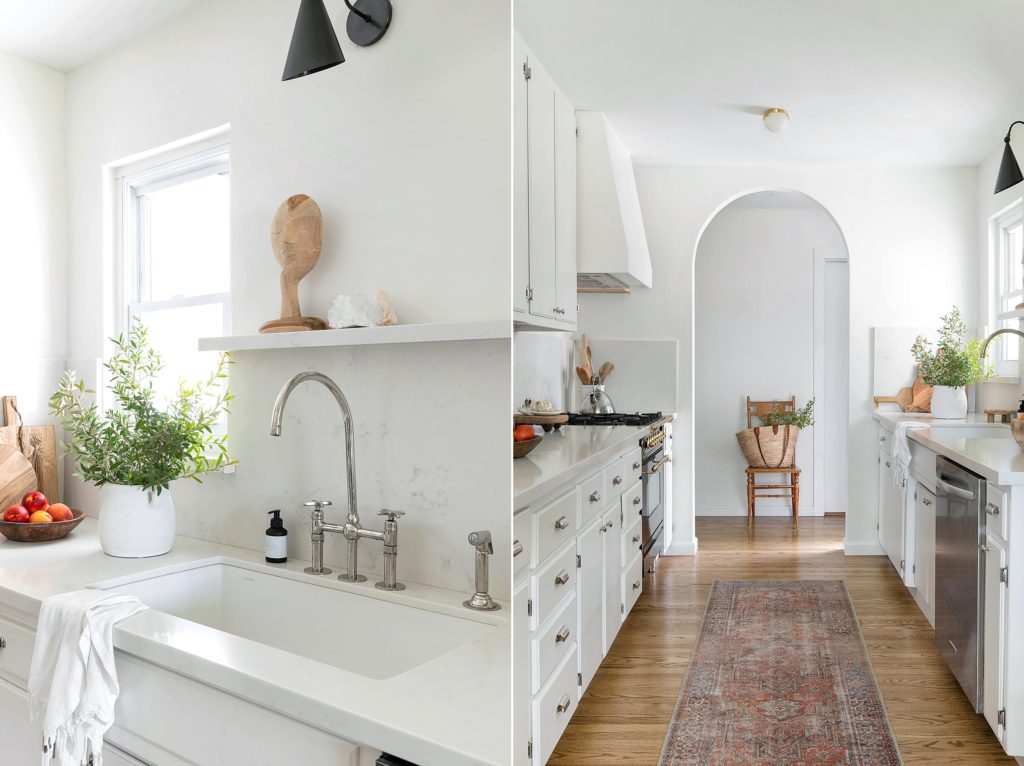
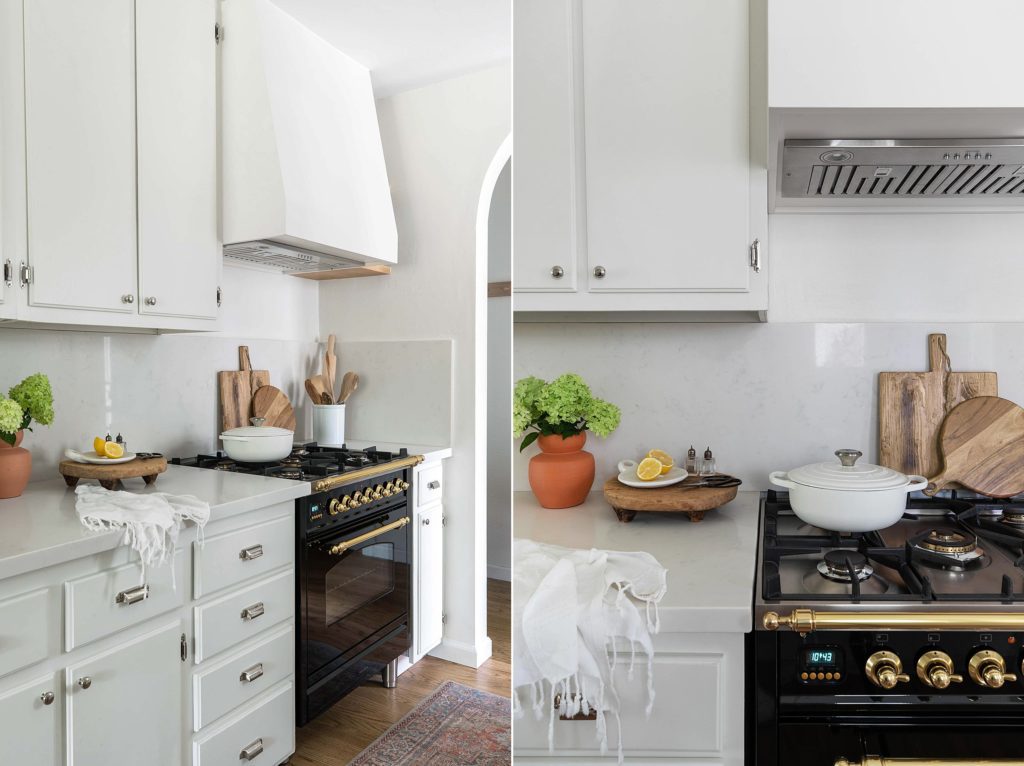
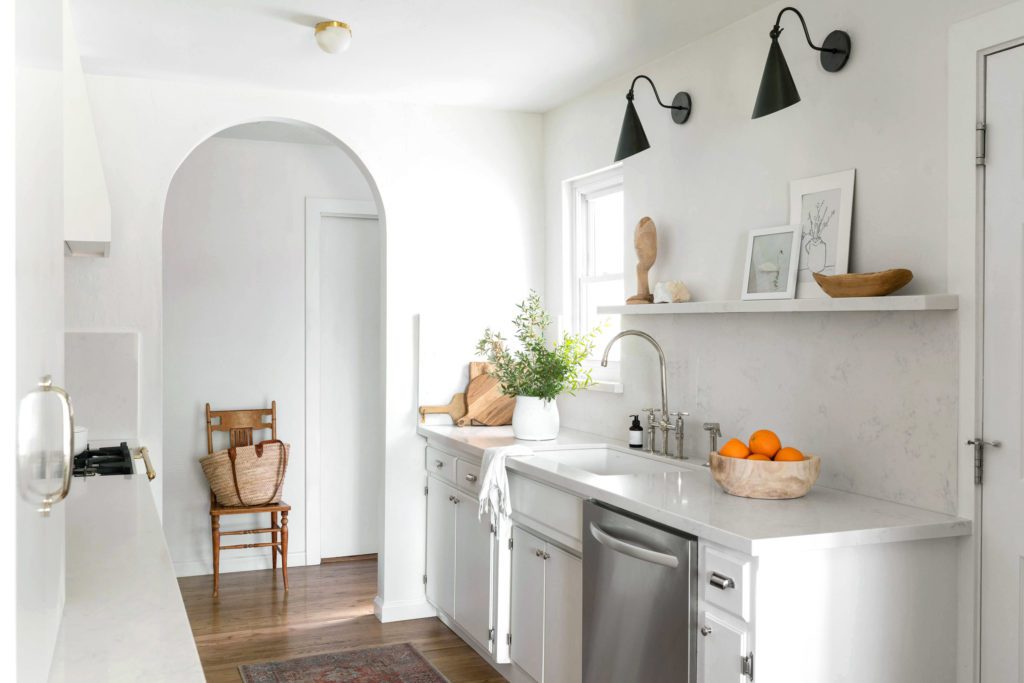
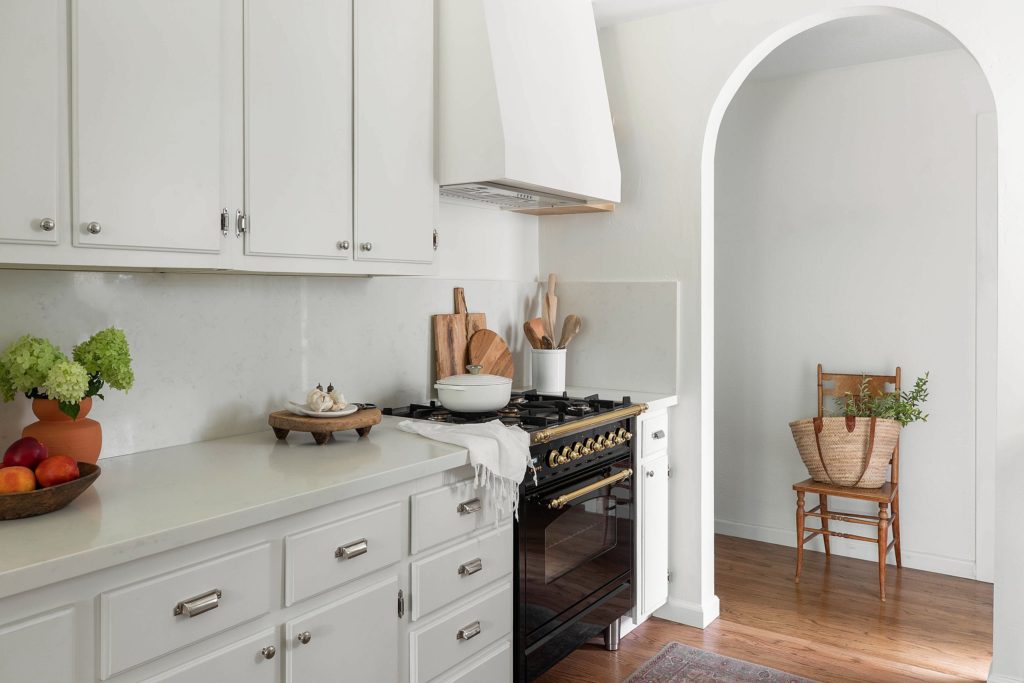
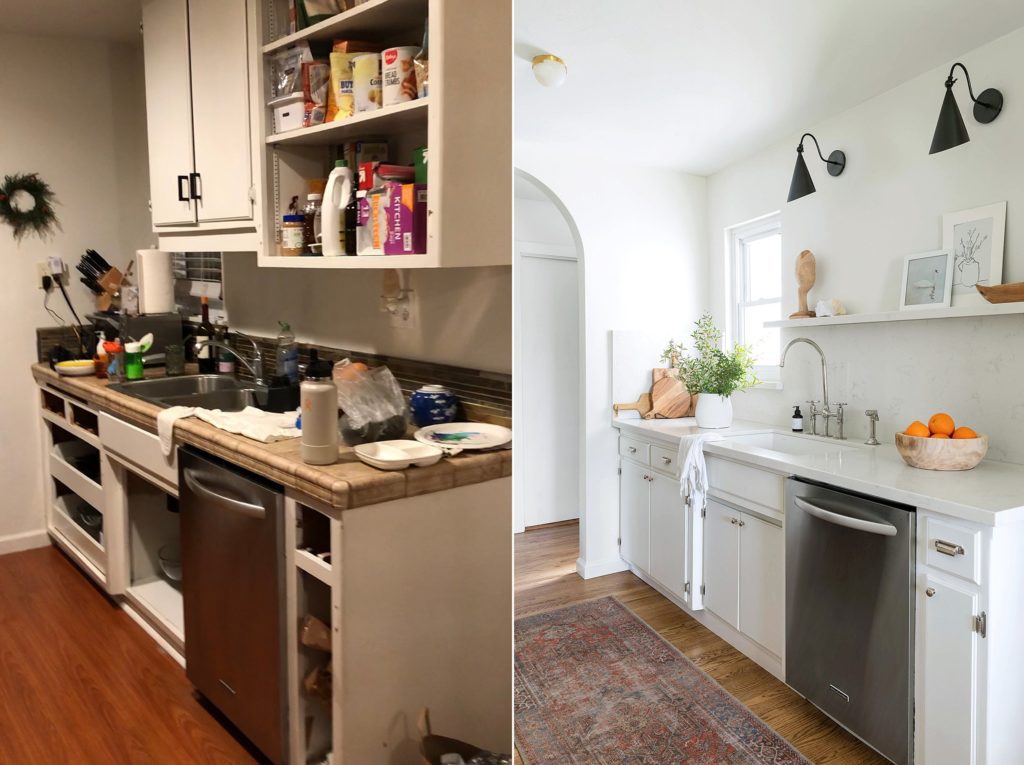
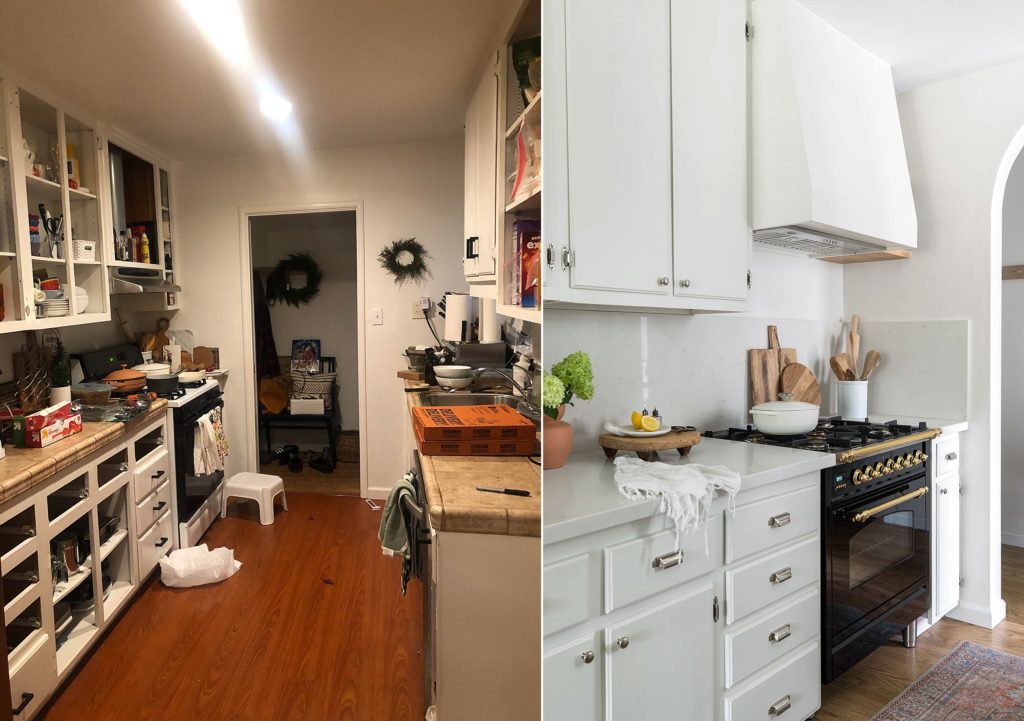
The remaining work had to be hired out to my contractor. In order to create some visual space and brighten the room I took out all of the upper cabinets above the sink area. It makes a world of difference not staring straight into a cabinet while washing dishes! I also added new hardwood flooring, a custom hood over my range, widened the doorway and turned it into an archway, added an imperfect smooth skim coat to the walls and I swapped out my old recessed can lights with some cute flush mount light fixtures. We also relocated one of the recessed lights so I could run three equally spaced flush mounts down the center of my kitchen.
This kitchen was a HUGE labor of love and was accompanied by many sleepless nights over the last year. It didn’t all happen overnight and there were a lot of bumps along the way that I had to problem solve alone, one of my biggest fears.
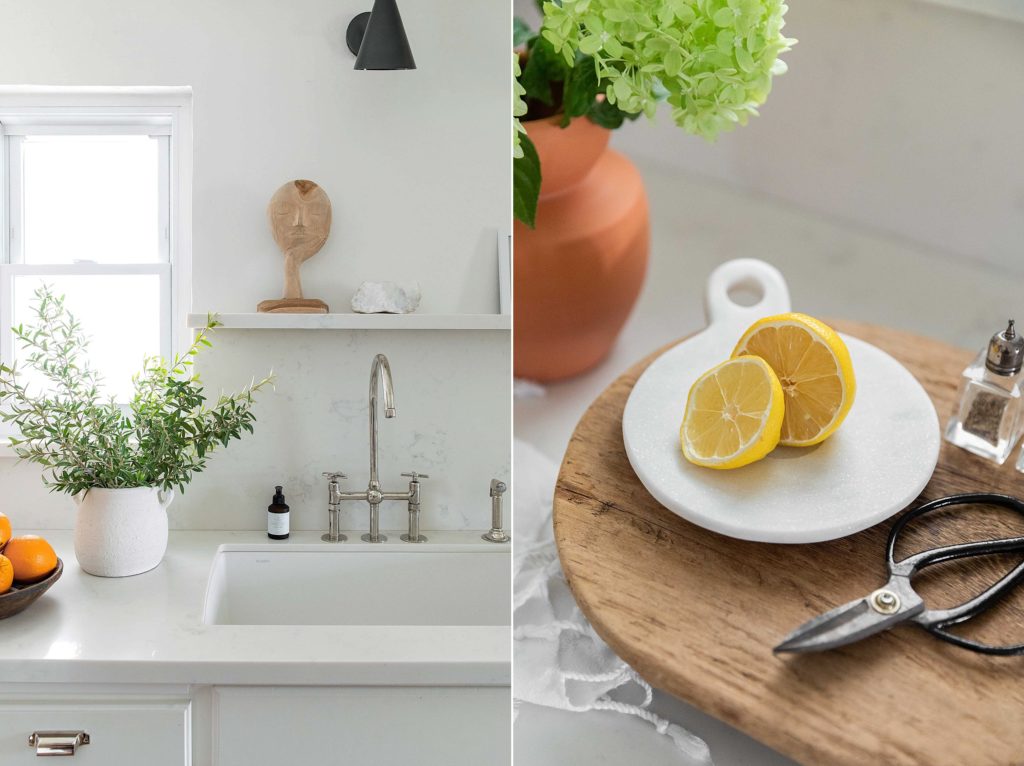
It’s the small details in this space like adding in an arch, swapping out recessed can lights for low profile flush mounts and the ledge over my sink that really bring this space to life for me. The added moments of character make or break a design in my personal opinion…for whatever that’s worth!! But I’ve learned so much and grown in ways I didn’t expect just from taking on this renovation. I couldn’t be more grateful for my little galley kitchen with a bunch of added character and it’s clean design. There’s even a part two coming that will show how the kitchen connects to the living room… spoiler alert, it involves a second arch and a new window!!! Stay tuned for more :)
Simple and elegant! In the beginnings of our kitchen renovation, thanks for the insider info. Job well done woman!
What time of day do you shoot?
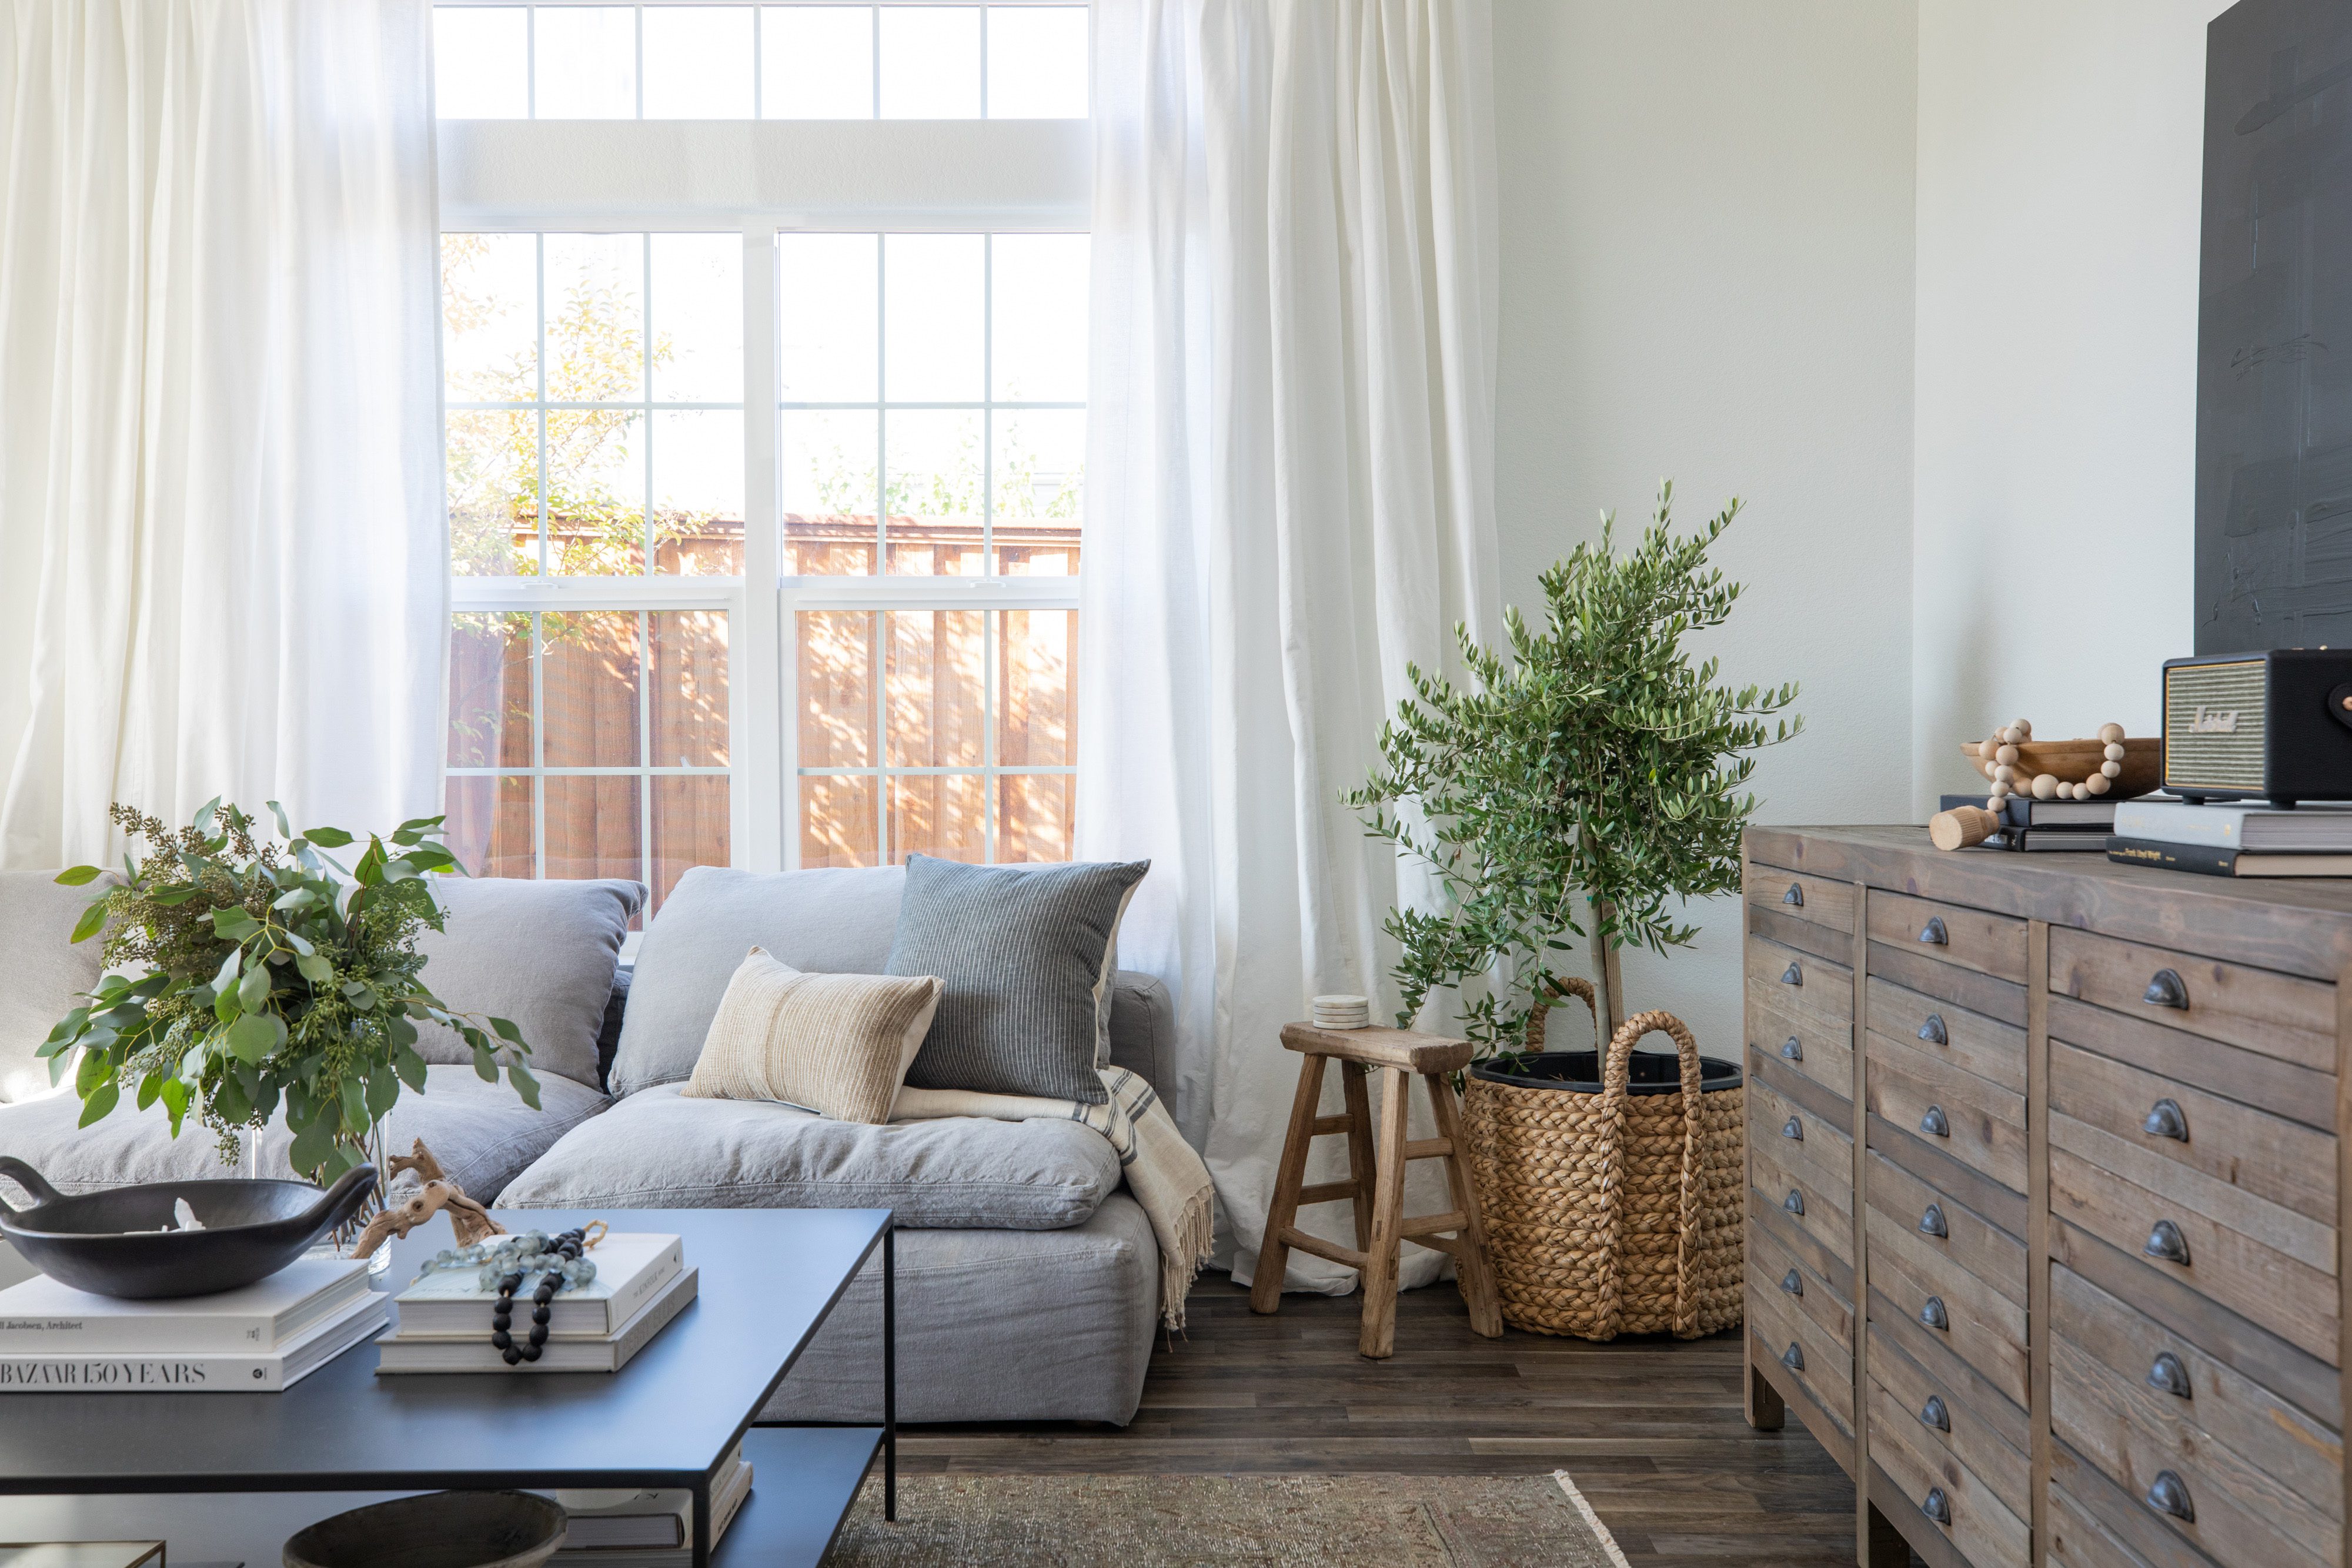
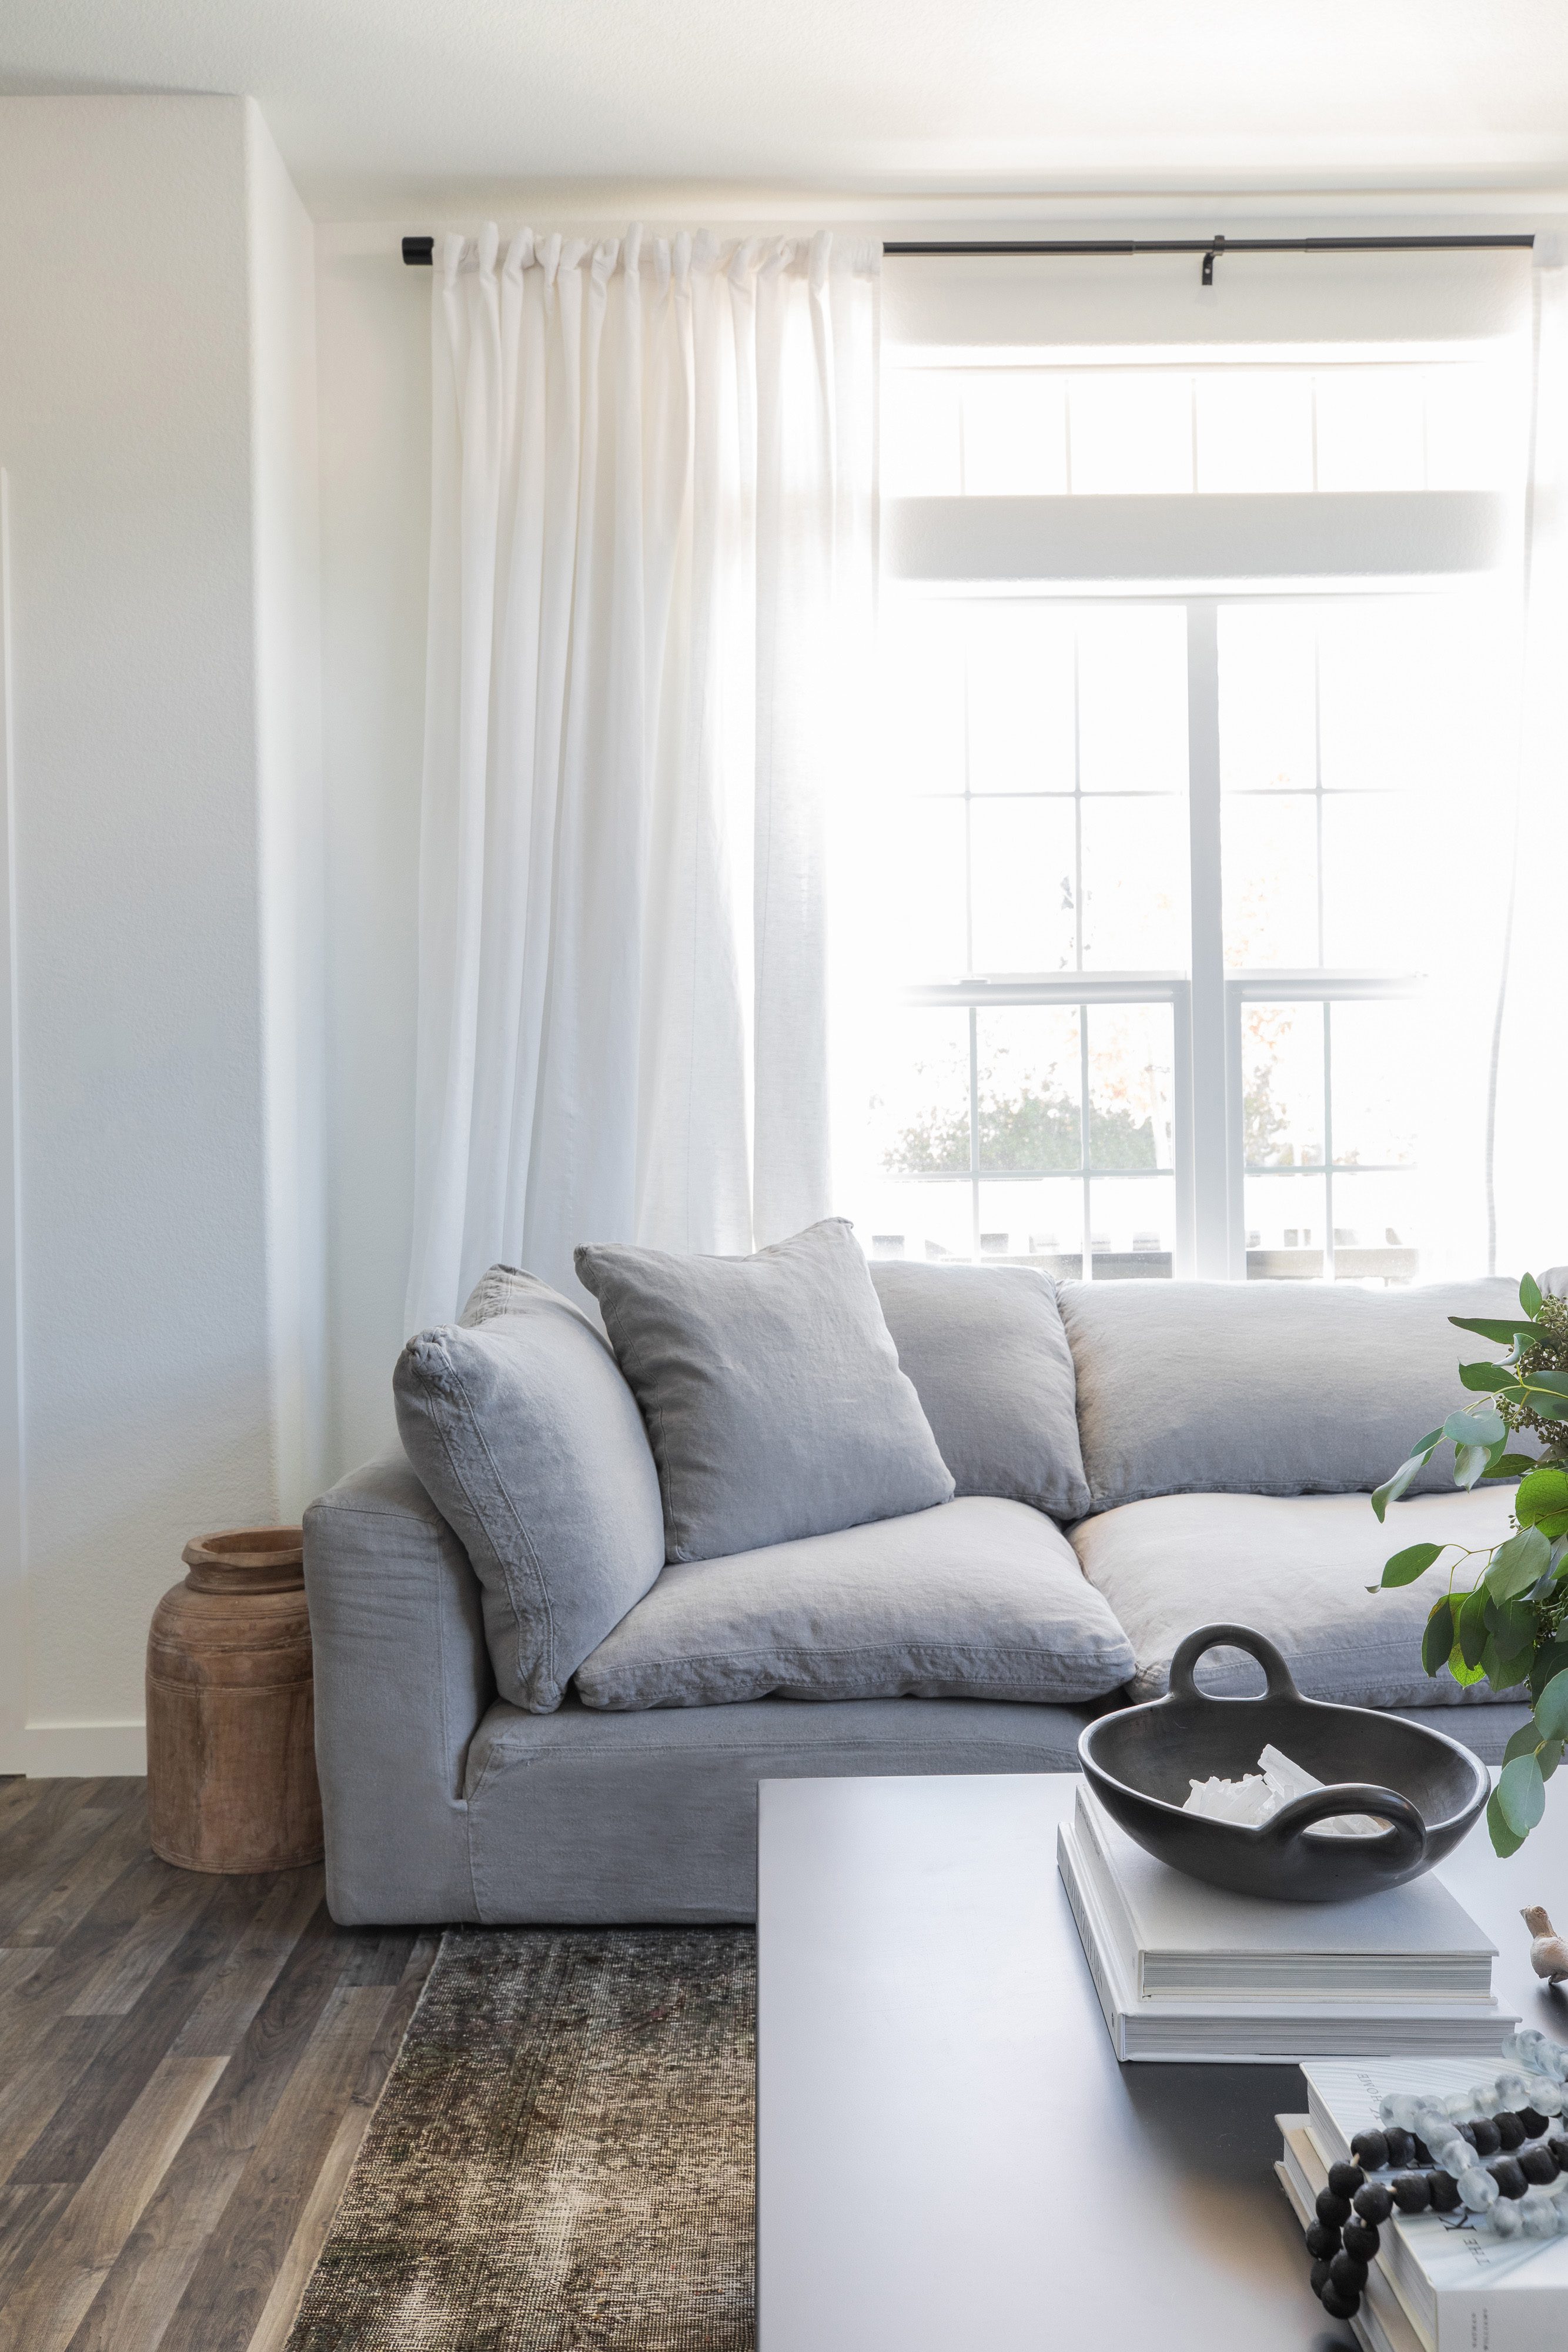
As a natural light photographer, the time we shoot is based on the direction the windows face within any room. If we’re shooting a full home, we generally move around the home with the sun! Because of this, I always ask my clients which direction the windows face within a space before setting the time for a shoot. I generally try to shoot when the rooms offer their best natural light.
i.e. East facing rooms photograph best in the morning, South facing rooms photograph best mid day, and West facing rooms photograph best in the evening. North facing rooms are tricky unless we have other windows in the room to work with.
How much should I bring to style the home with?
The short answer is SO MUCH. Bring it all, and bring as much as you can! The long answer is below…
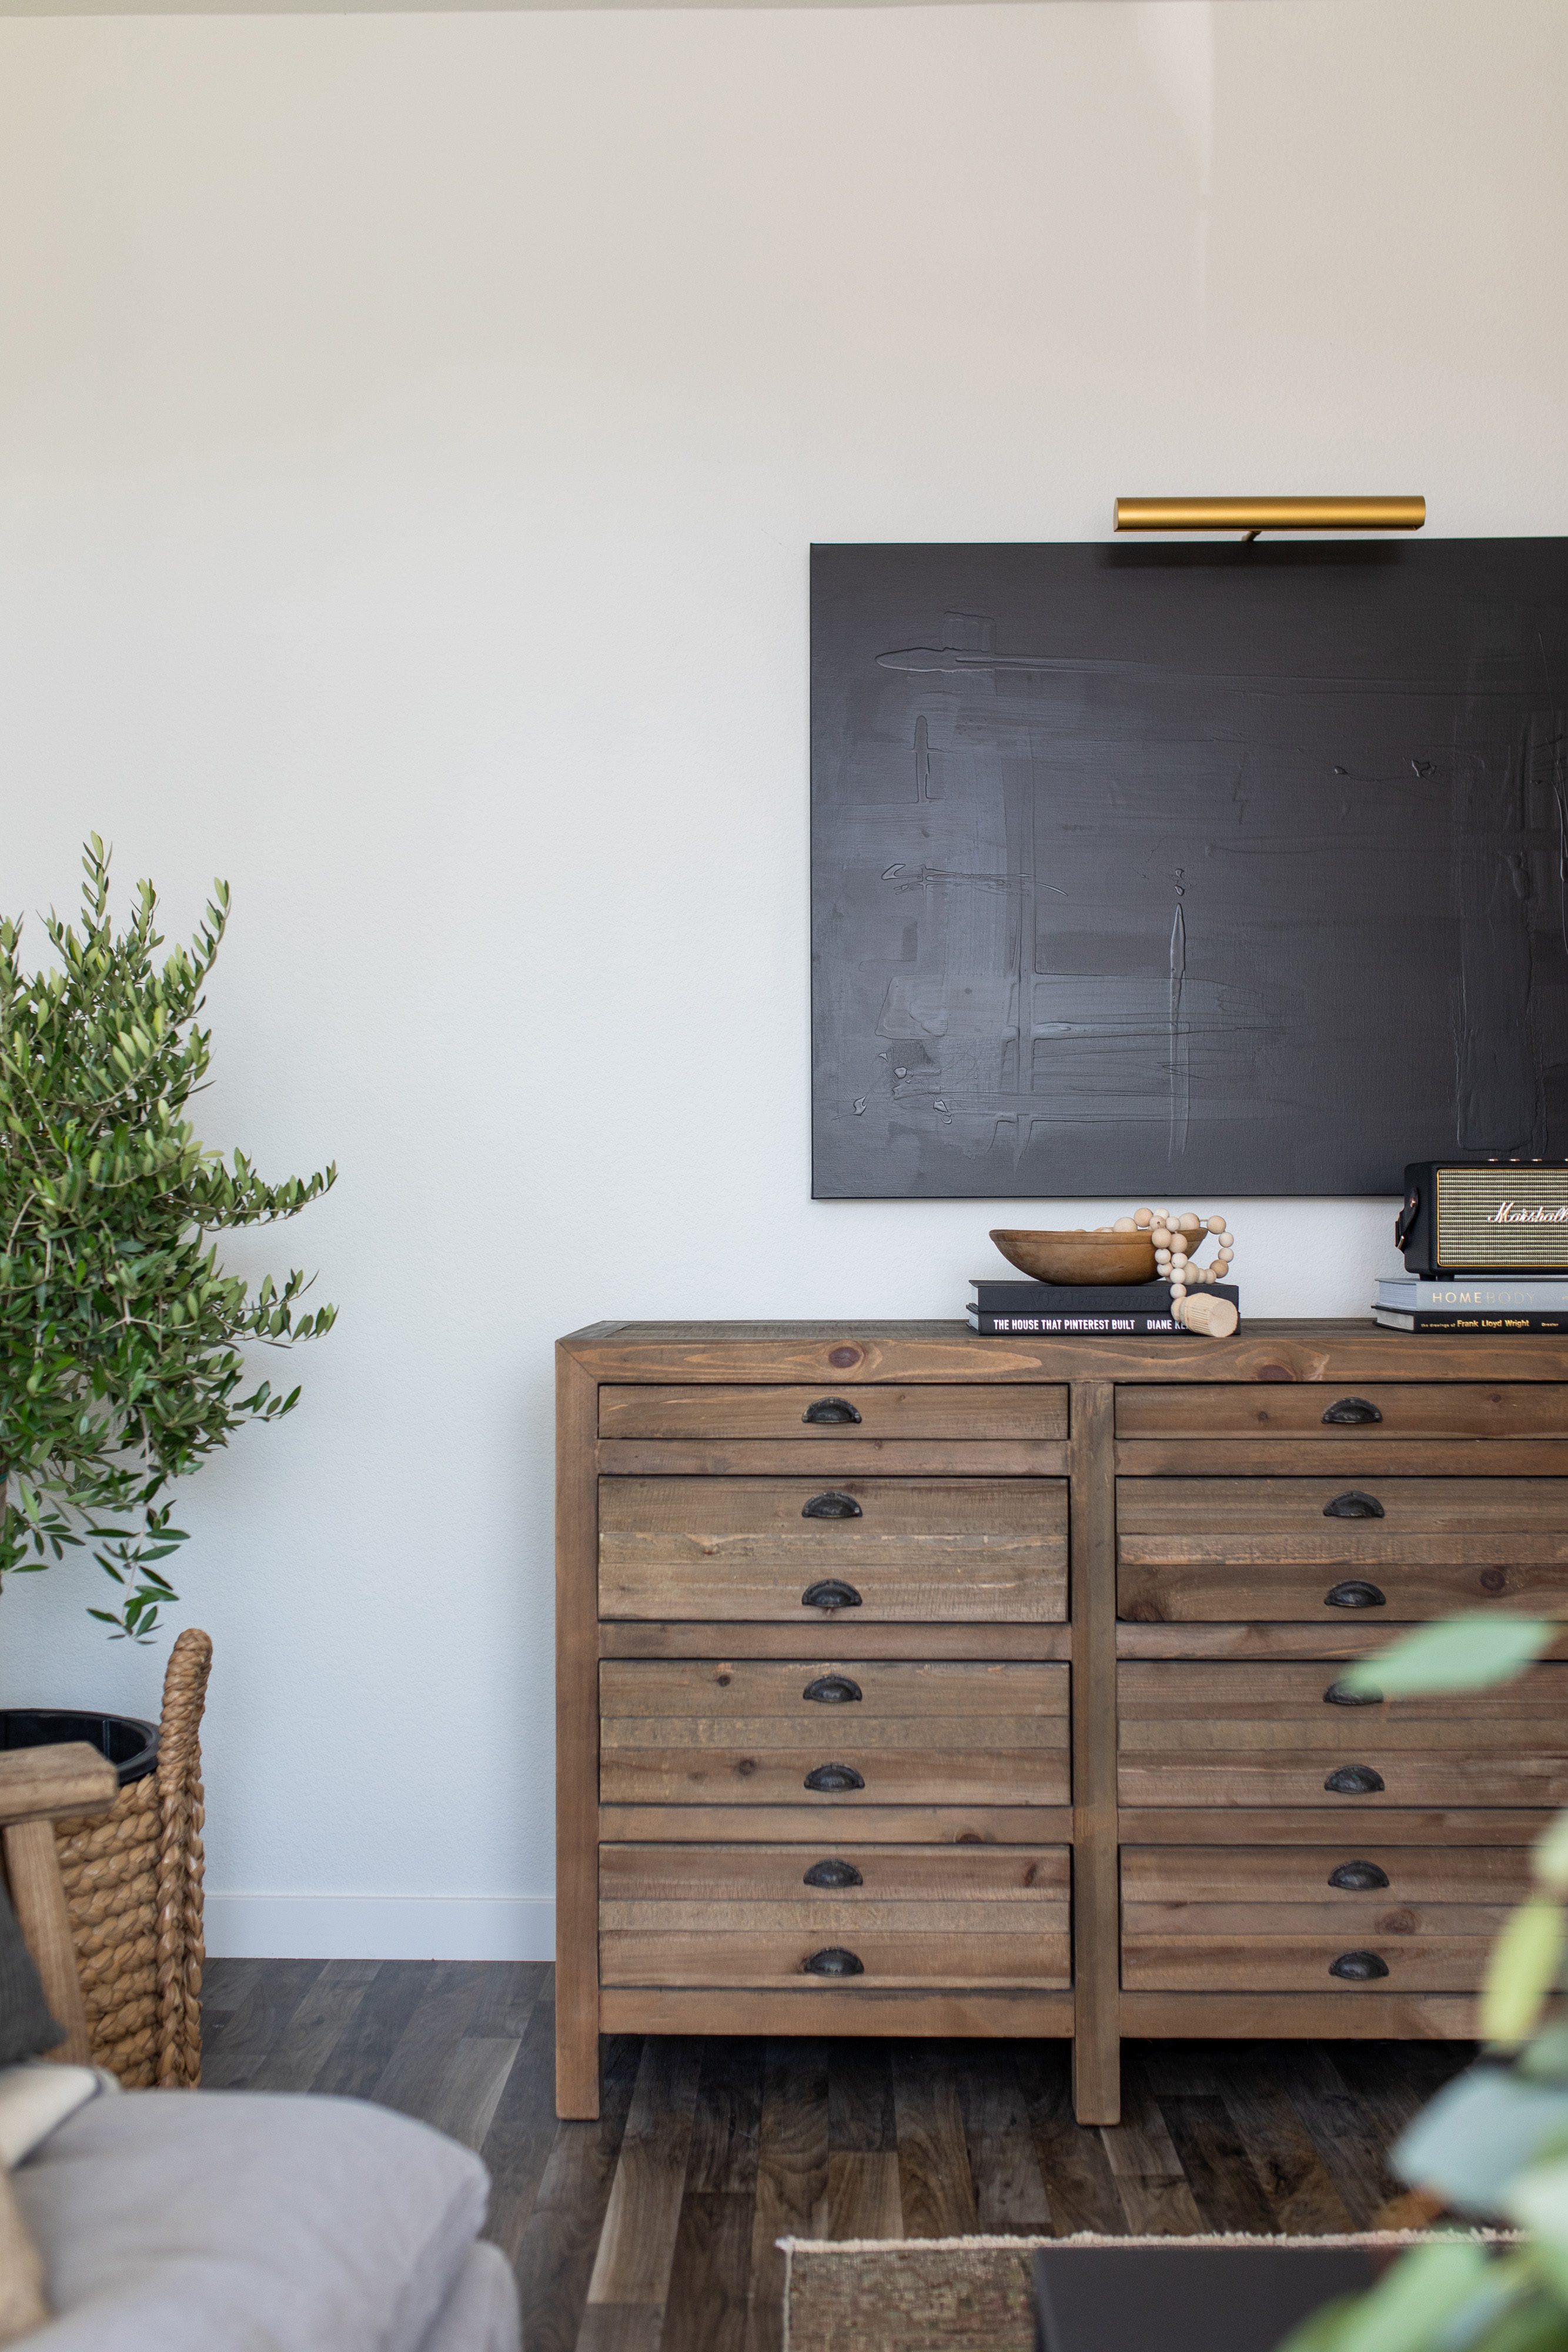
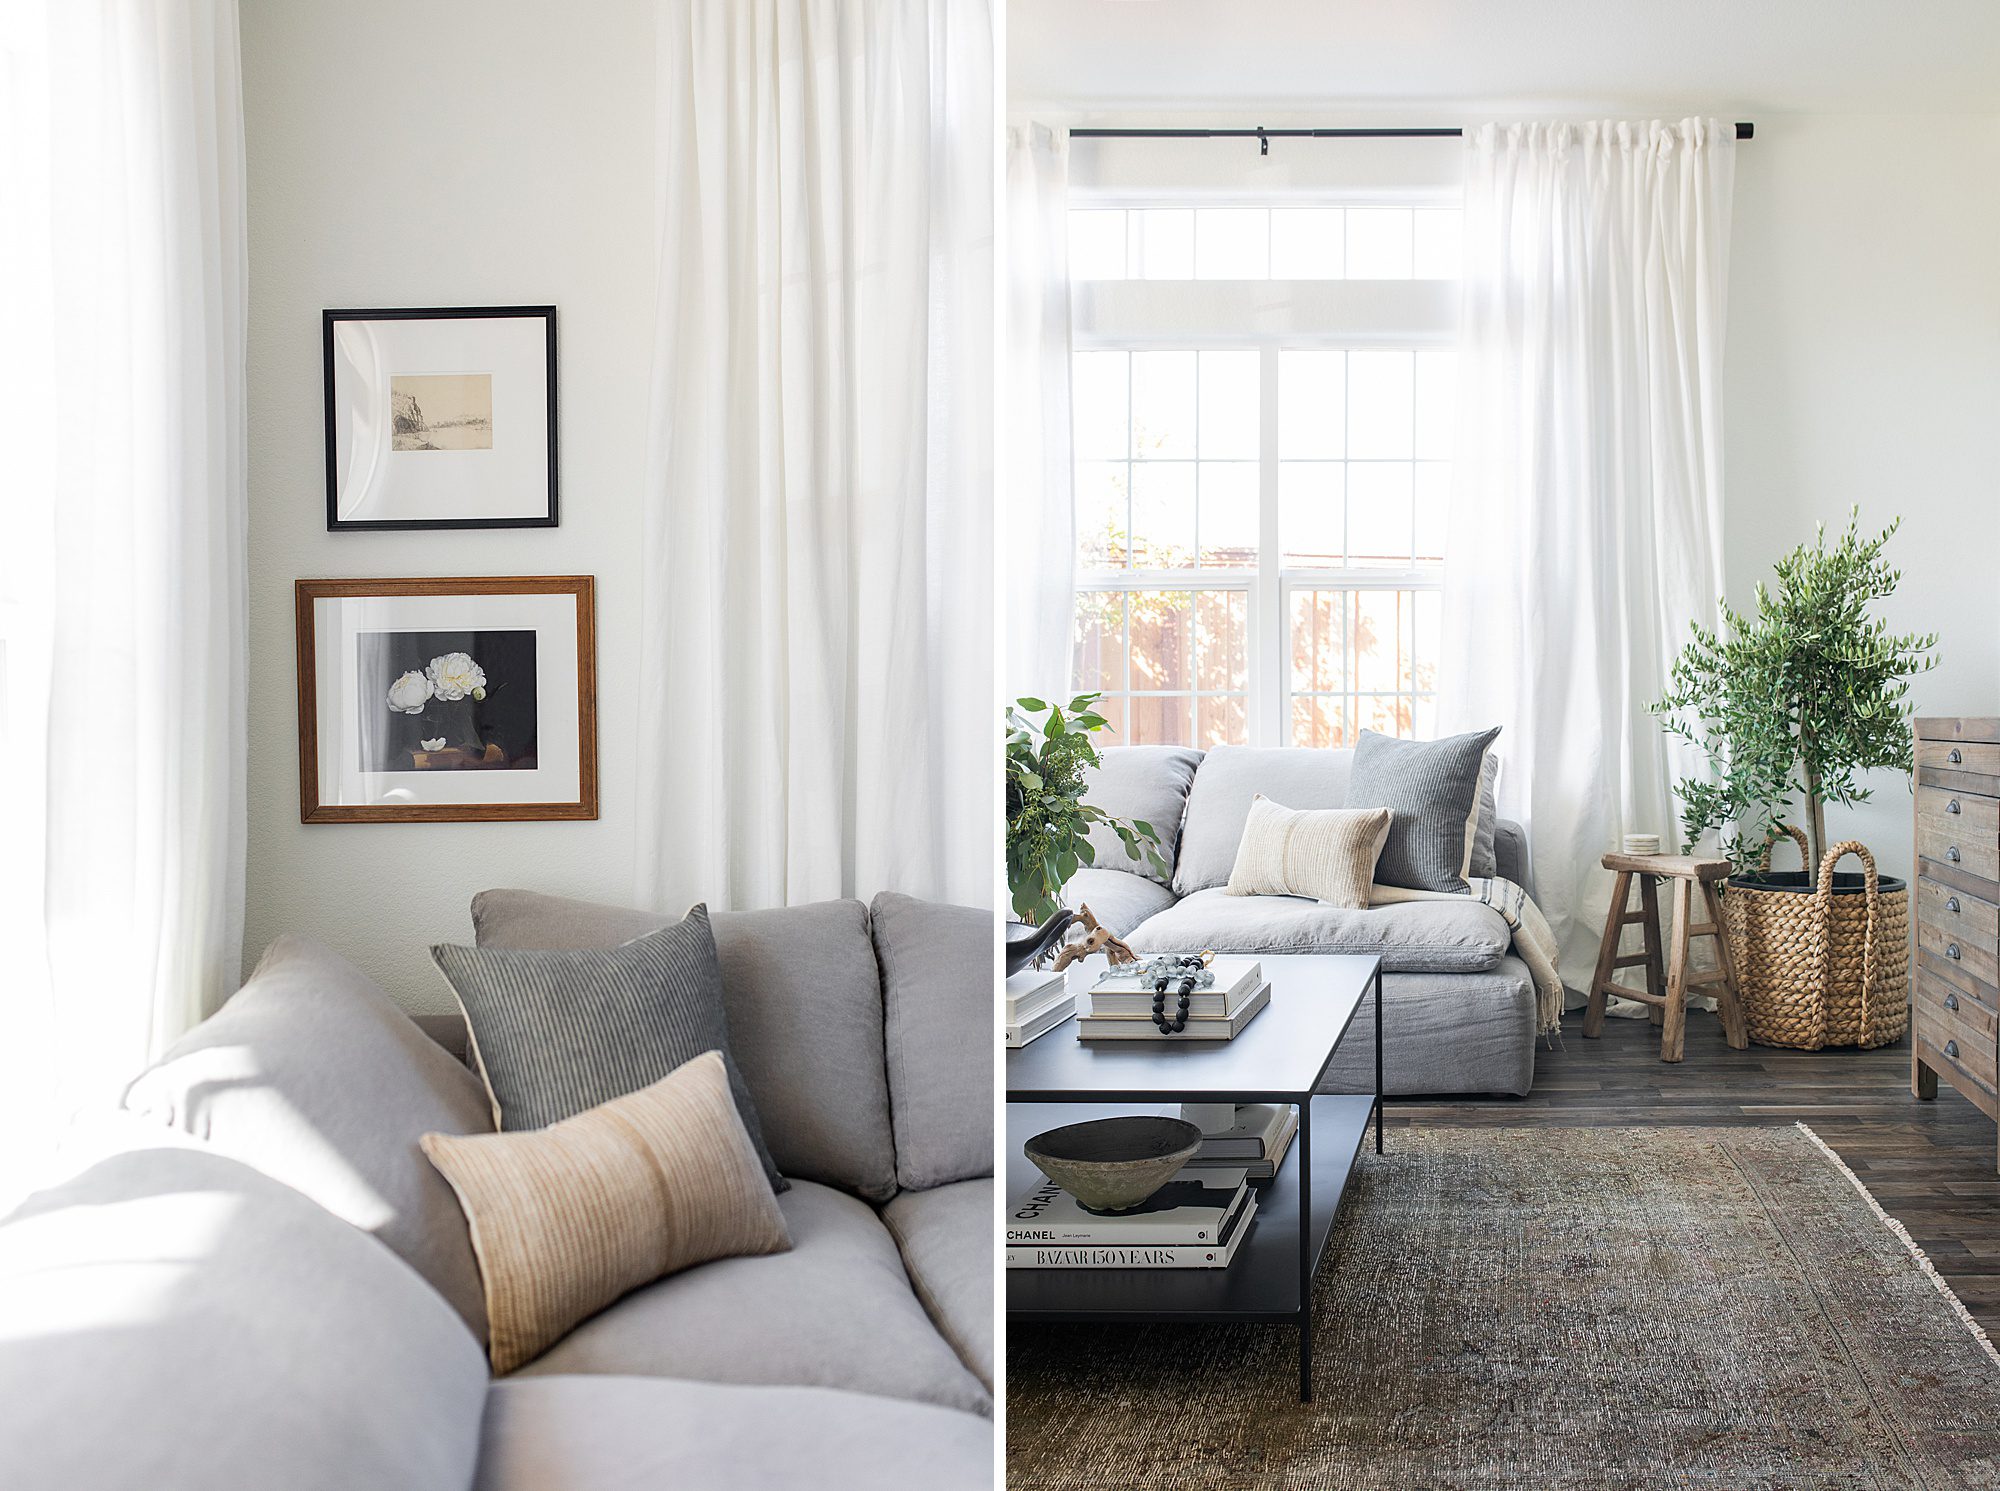
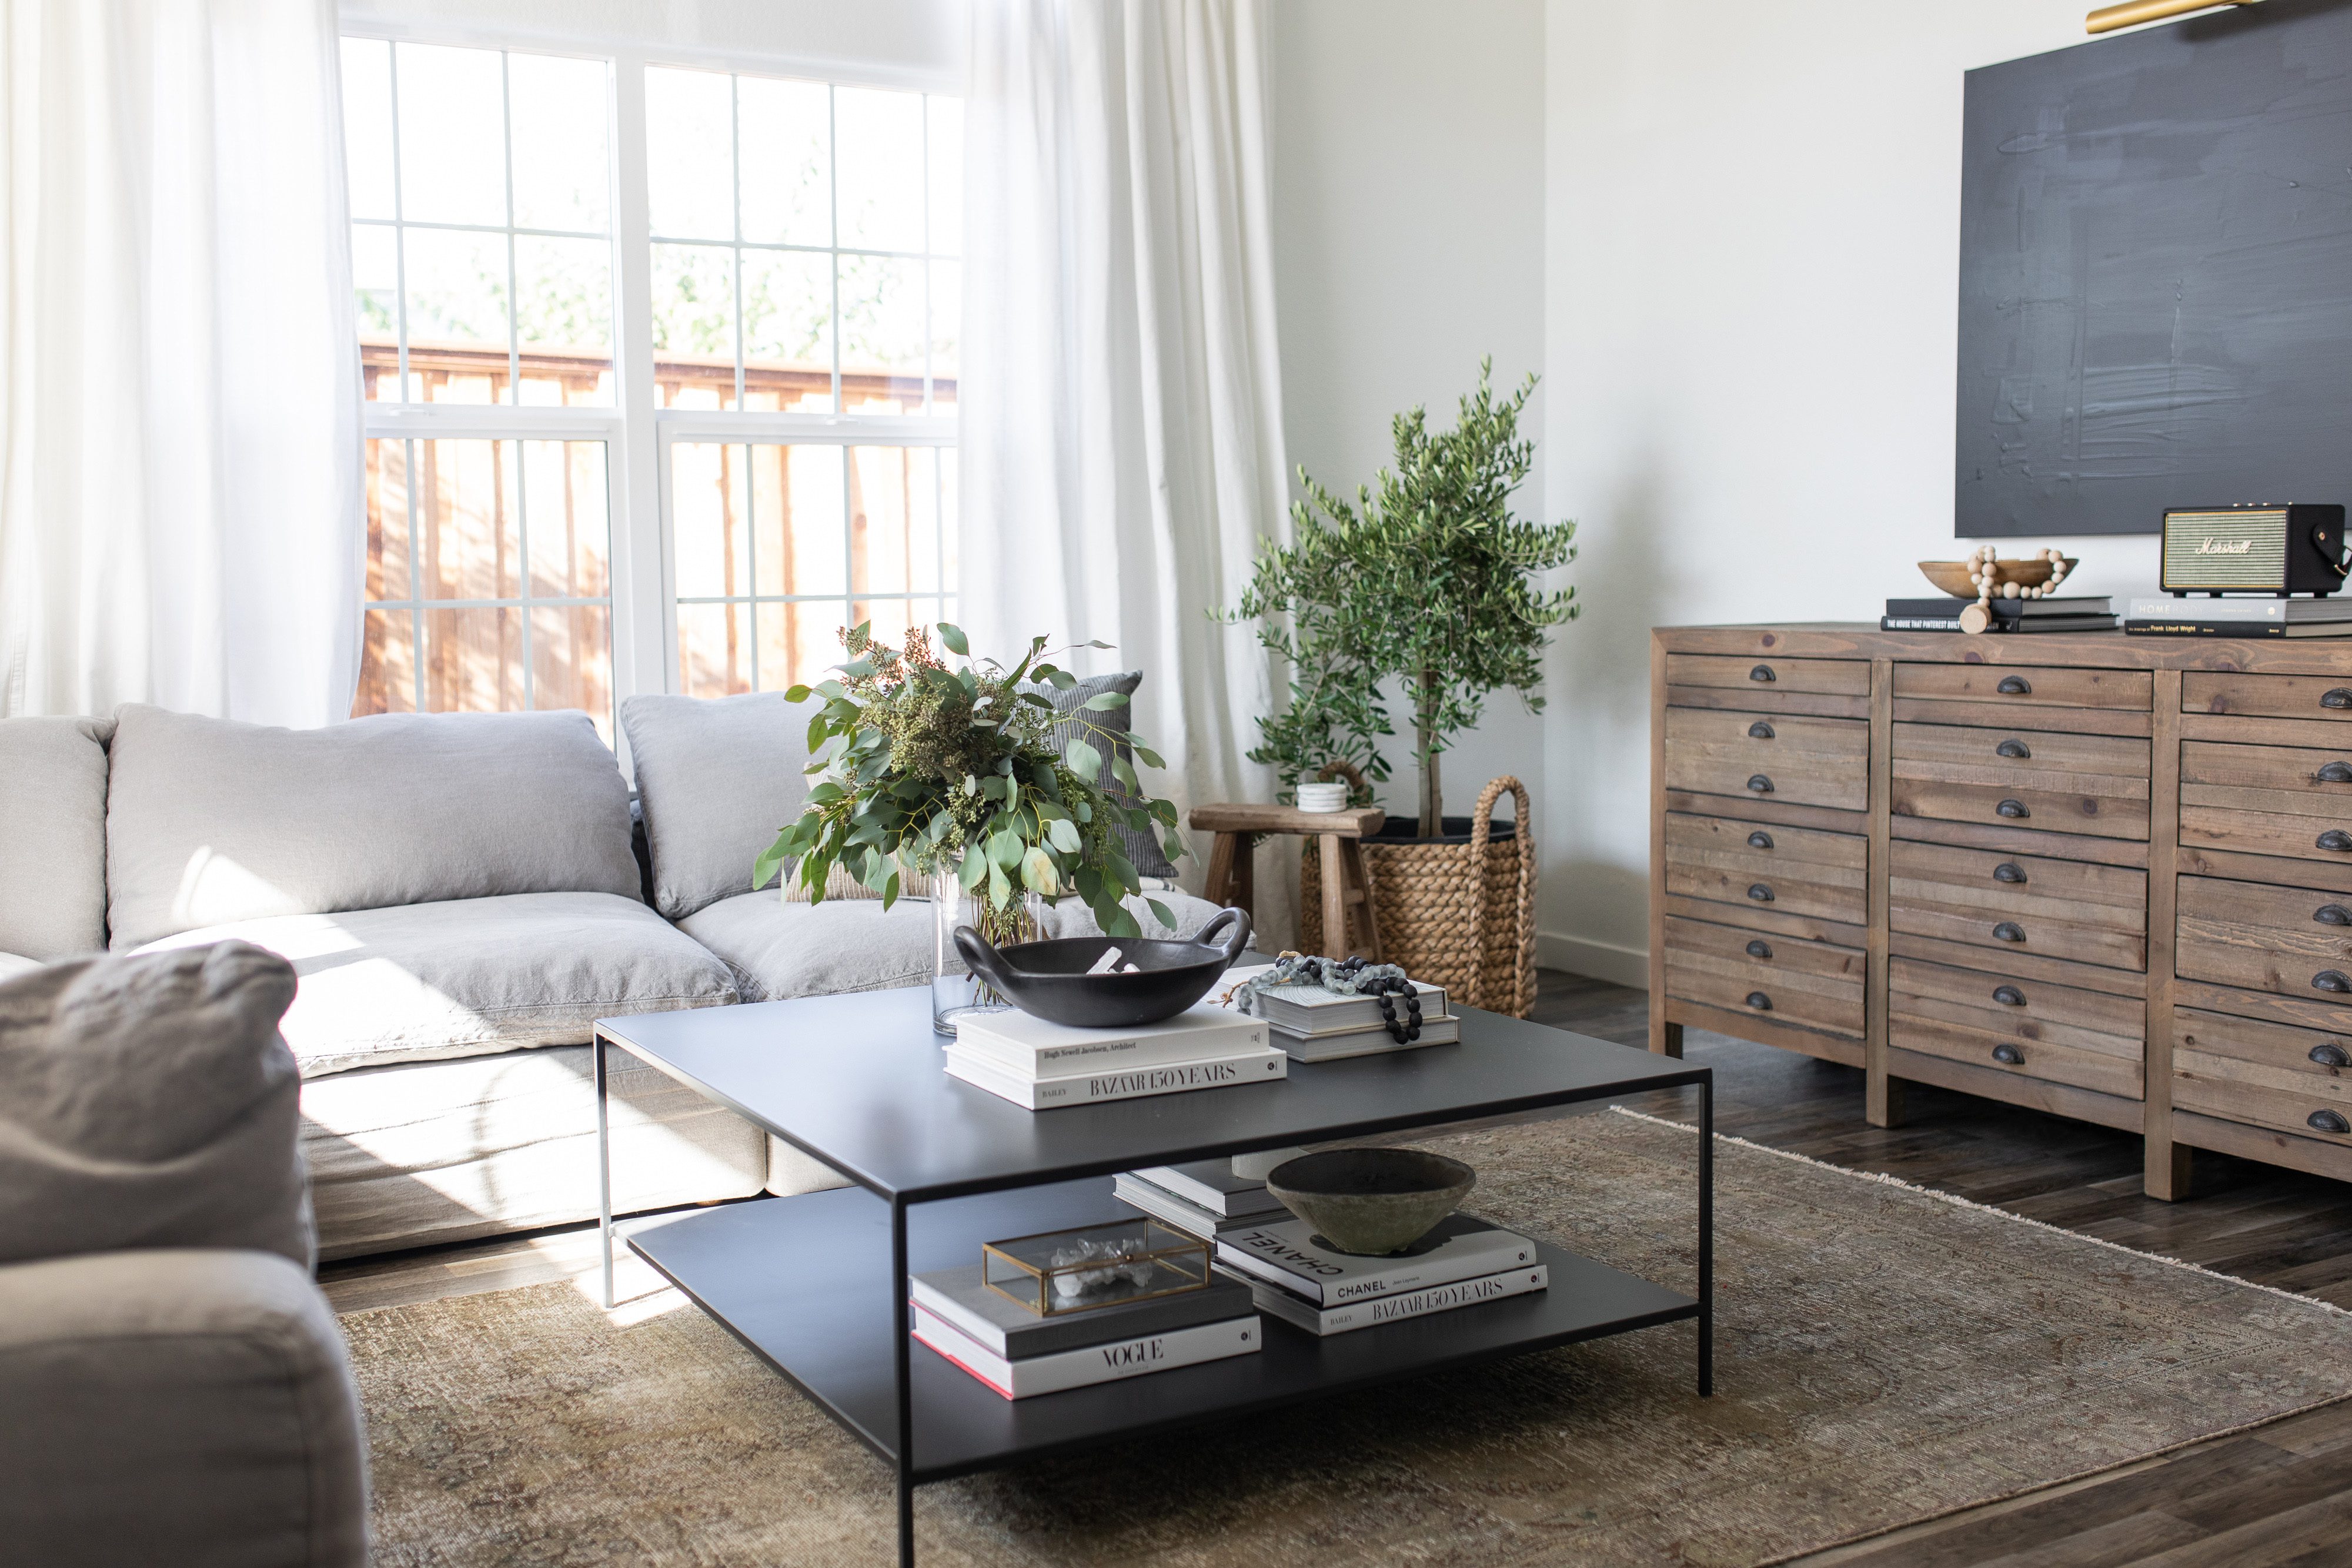
For living rooms – bring a ton of throws, pillows, rugs to swap out (unless you like what your client already has in your home), coffee table books, and of course a bunch of trinkets to pile on books, and to add and subtract from rooms.
For kitchens – think cutting boards (large scale), cook books, trays, bowls, fresh fruits and veggies (apples/pears/limes/lemons/artichokes/egg plant all photograph well)
For bedrooms – fresh linens if you don’t like the bedding your client has, pillows, throws, more books, candles and trinkets.
For bathrooms – Turkish towels (these photograph better than standard towels), soap dispenser, sponge, stool to place by the tub, trays and trivets to stack near the sink.
And for all rooms I recommend real greenery, not fake. Don’t mix your greenery either (i.e. don’t mix two types of eucalyptus leaves in one vessel, or multiple greens from a bouquet arrangement in one vessel). On that note, I don’t recommend buying bouquets of flowers from the store as these look exactly like a bouquet from the grocery store when photographed. In addition, I recommend removing any family photos in the home to respect your client’s privacy since the images will be used in a public manner.
3. How long does it take to photograph a house?
This question varies from project to project! The factors that make this vary are – the available light within a space, how much detail there is to shoot and how large the project is. In general it takes about 1-2.5 hours to photograph a single room within a home depending on the above details. It also depends on how much we move around at the shoot – if all of the rooms are set and ready to shoot then we’re in and out much quicker. If we have to shift things around, style and restyle the space then this always adds additional time.
I hope you found this helpful as you prepare for your upcoming shoot! :)
 If you’re anything like me then you do 90% of your shopping from the comfort of your couch..in your sweatpants..on Amazon. Especially now that we’re all social distancing and creating some space from the outside world.
And I don’t know about you but I am obsessed with browsing and shopping from curated Amazon storefront pages.
So, I joined the fun and created one myself.. I compiled all of my favorite Amazon finds into one spot, just for you!
** Shop all of my Amazon Favorites Right Here **

There are plenty more categories for you to shop from though, like books to read, non-toxic household products….it’s ALL there.
As a new mama, Amazon was my absolute saving grace…when you’re cooped up in the house with a newborn it’s almost impossible to leave the house and purchase necessities like burp rags, onesies, and a book to keep you occupied during all of those long feeding sessions.
So while we’re all quarantined in our homes, in some particularly uncertain times…let’s stay safe and do our shopping online!
Don’t forget to click here to see what I love on Amazon
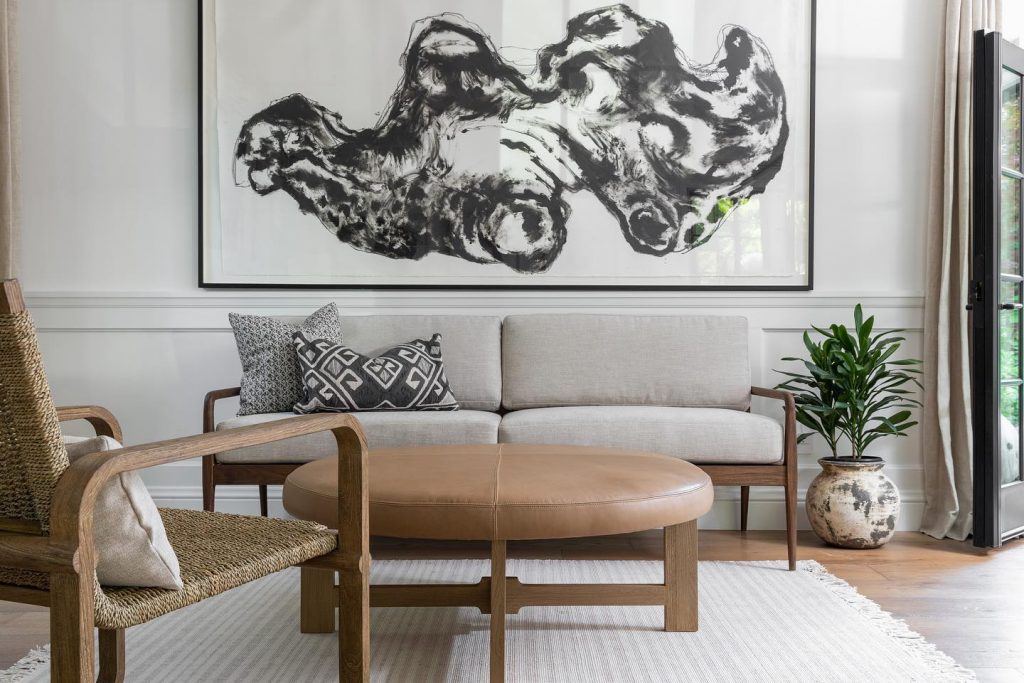
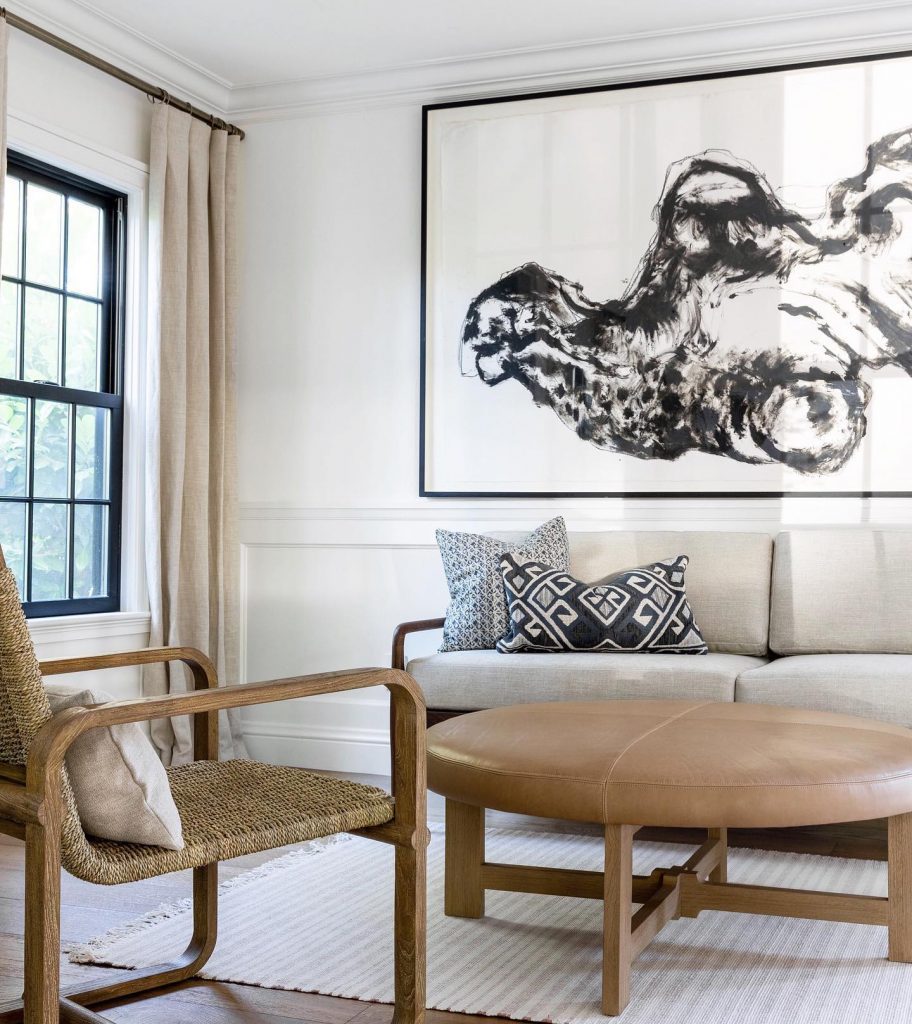
I photographed this space last year for DeWilde Design Co’s entry in the One Room Challenge Fall event. The ORC is a 6 week challenge where a designer makes over a room in 6 weeks, all the while documenting the progress on their blog.
I have had the pleasure of photographing several One Room Challenge projects for various interior designers in the Sacramento Area. It’s always a fun challenge because of the tight turn around. We generally photograph the space the weekend of week 6, and have the photos ready to go live by the following Wednesday (a 4 day turn around!)
This was a favorite of mine from 2019, Justyne is so much fun to work with and clearly, so talented.
To see the full 6 week transformation you can go to her blog series, here.
Designed by DeWilde Design Co
Welcome
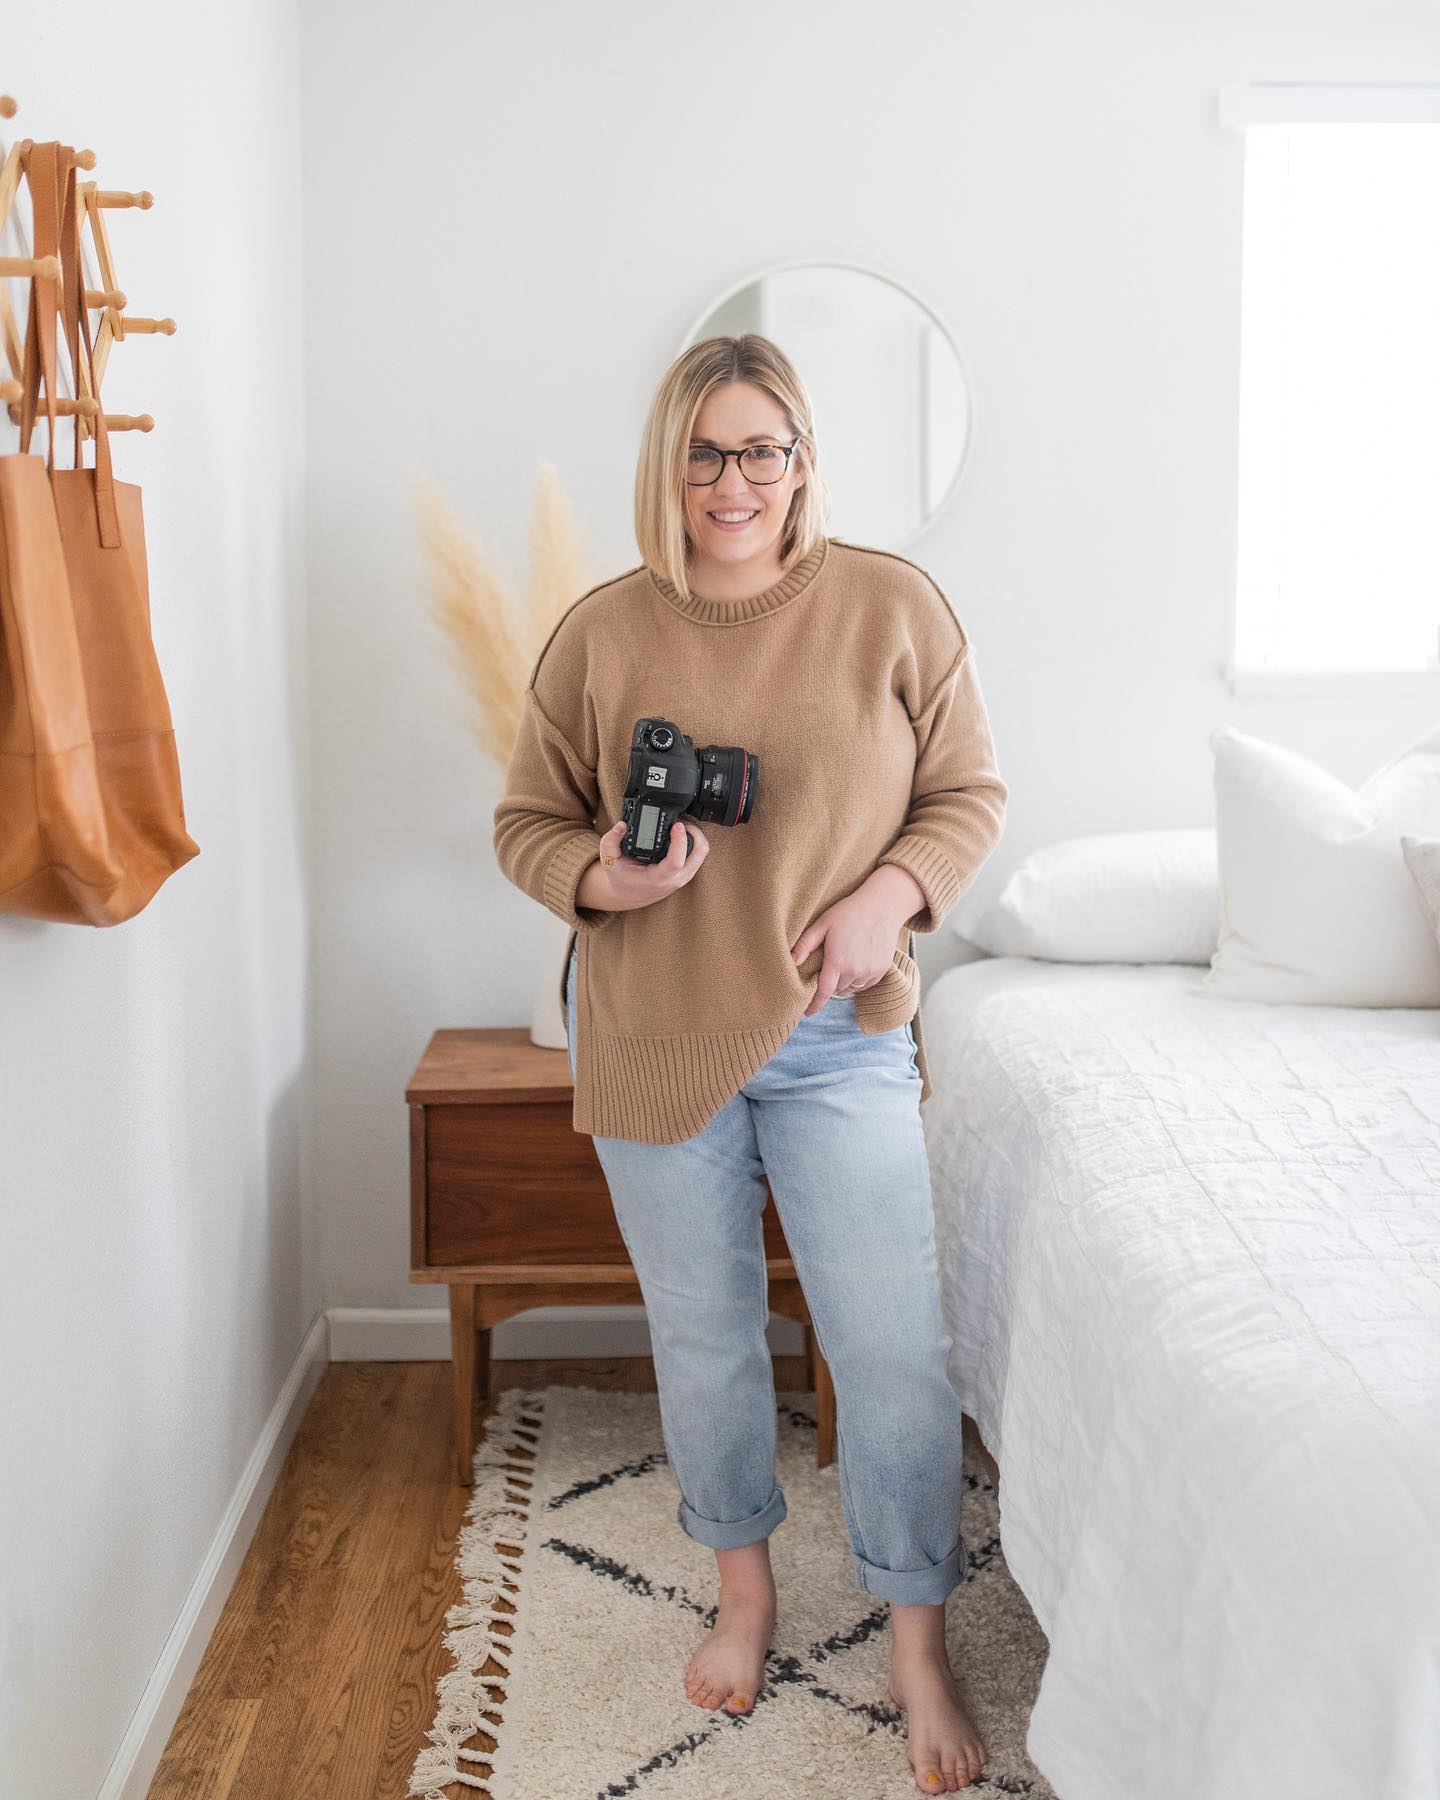
Welcome to the blog! You’ll find everything here from portfolio work and tips for new photographers, to personal posts related to motherhood and bits of my home! Stick around to see what’s new each week.
Get in touch! nicolediannephoto@gmail.com
Located in Sacramento, California